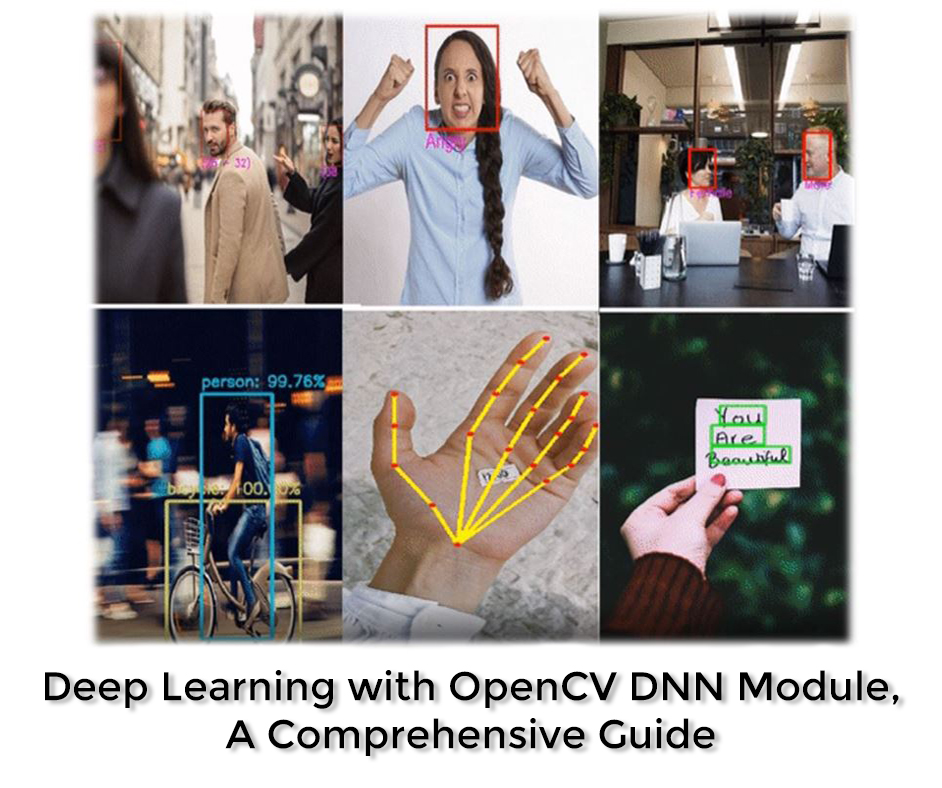
In this tutorial we will go over Deep learning using OpenCV’s DNN module in detail, I plan to cover various important details of the DNN module that is never discussed, things that usually trip of people like, selecting preprocessing params correctly and designing pre and postprocessing pipelines for different models.
This post is the first of 3 in our brand new Deep Learning with OpenCV series. All three posts are titled as:
- Deep Learning with OpenCV DNN Module, A Comprehensive Guide
- Training a Custom Image Classifier with Tensorflow, Converting to ONNX and using it in OpenCV DNN module
- Using a Custom Trained Object Detector with OpenCV DNN Module
This post can be split into 3 sections.
- Introduction to OpenCV’s DNN module.
- Using a Caffe DenseNet121 model for classification.
- Important Details regarding the DNN module, e.g. where to get models, how to configure them, etc.
If you’re just interested in the image classification part then you can skip to the second section or you can even read this great classification with DNN module post by Adrian. However, if you’re interested in getting to know the DNN module in all its glory then keep reading.
Introduction to OpenCV’s DNN module
First let me start by introducing the DNN module for all those people who are new to it, so as you can probably guess, the DNN module stands for Deep Neural Network module. This is the module in OpenCV which is responsible for all things deep learning related.
It was introduced in OpenCV version 3 and now in version 4.3, it has evolved a lot. This module lets you use pre-trained neural networks from popular frameworks like TensorFlow, PyTorch etc, and use those models directly in OpenCV.
This means you can train models using a popular framework like Tensorflow and then do inference/prediction with just OpenCV.
So what are the benefits here?
Here are some advantages you might want to consider when using OpenCV for inference.
- By using OpenCV’s DNN module for inference the final code is a lot compact and simpler.
- Someone who’s not familiar with the training framework can also use the model.
- There are cases where using OpenCV’s DNN module will give you faster inference results for the CPU. See these results by Satya.
- Beside supporting CUDA based NVIDIA’s GPU, OpenCV’s DNN module also supports OpenCL based Intel GPUs.
- Most Importantly by getting rid of the training framework not only makes the code simpler but it ultimately gets rid of a whole framework, this means you don’t have to build your final application with a heavy framework like TensorFlow. This is a huge advantage when you’re trying to deploy on a resource-constrained edge device, e.g. a Raspberry pie.
One thing that might put you off is the fact that OpenCV can’t be used for training deep learning networks. This might sound like a bummer but fret not, for training neural networks you shouldn’t use OpenCV there are other specialized libraries like Tensorflow, PyTorch, etc for that task.
So which frameworks can you use to train Neural Networks:
These are the frameworks that are currently supported with the DNN module.
Now there are many interesting pre-trained models already available in the OpenCV Model Zoo that you can use, to keep things simple for this tutorial, I will be using an image classification network to do classification.
I have also made a tutorial on doing Super-Resolution with DNN module and Facial expression recognition that you can look at after going through this post.
Details regarding other types of models are discussed in the 3rd section. By the way, I actually go over 13-14 different types of models in our Computer Vision and Image processing Course. These contain notebooks tutorials and video walk-throughs.
Image Classification pipeline with OpenCV DNN
Now we will be using a DenseNet121 model, which is a Caffe model trained on 1000 classes of ImageNet. The model is from the paper Densely Connected Convolutional Networks by Gap Huang et al.
Generally, there are 4 steps you need to perform when doing deep learning with the DNN module.
- Read the image and the target classes.
- Initialize the DNN module with an architecture and model parameters.
- Perform the forward pass on the image with the module
- Post-process the results.
The pre and post-processing steps are different for different tasks.
Let’s start with the code
Download Code
[optin-monster slug=”ag6ktwkaclnxqrmfitmo”]
You can go ahead and download the source code from the download code section. After downloading the zip folder, unzip it and you will have the following directory structure.
├── Image Classification with DenseNet121.ipynb
│
├───images
│       cat.jpeg
│       dog.jpeg
│       green_lizard.jpg
│       jemma2.jpg
│       spcar.JPG
│
└───model
        DenseNet_121.caffemodel
        DenseNet_121.prototxt.txt
        synset_words.txt
Now run the Image Classification with DenseNet121.ipynb notebook, and start executing the cells.
Import Libraries
First, we will import the required libraries.
# Importing Required libraries
import numpy as np
import time
import cv2
import matplotlib.pyplot as plt
import os
import sys
Loading Class Labels
Now we’ll start by loading class names, In this notebook, we are going to classify among 1000 classes defined in ImageNet.
All these classes are in the text file named synset_words.txt. In this text file, each class is in on a new line with its unique id, Also each class has multiple labels for e.g look at the first 3 lines in the text file:
- ‘n01440764 tench, Tinca tinca’
- ‘n01443537 goldfish, Carassius auratus’
- ‘n01484850 great white shark, white shark
So for each line, we have the Class ID, then there are multiple class names, they all are valid names for that class and we’ll just use the first one. So in order to do that we’ll have to extract the second word from each line and create a new list, this will be our labels list.
# Split all the classes by a new line and store it in variable called rows.
rows = open('model/synset_words.txt').read().strip().split("n")

# Check the number of classes.
print("Number of Classes "+str(len(rows)))

# Show the first 5 rows
print(rows[0:5])
Number of Classes 1000 [‘n01440764 tench, Tinca tinca’, ‘n01443537 goldfish, Carassius auratus’, ‘n01484850 great white shark, white shark, man-eater, man-eating shark, Carcharodon carcharias’, ‘n01491361 tiger shark, Galeocerdo cuvieri’, ‘n01494475 hammerhead, hammerhead shark’]
Extract the Label
Here we will extract the labels (2nd element from each line) and create a labels list.
# Split by comma after first space is found and grabb the first element and store it in a new list.
CLASSES = [r[r.find(" ") + 1:].split(",")[0] for r in rows]

# Print the first 20 processed class labels
print(CLASSES[0:20])
[‘tench’, ‘goldfish’, ‘great white shark’, ‘tiger shark’, ‘hammerhead’, ‘electric ray’, ‘stingray’, ‘cock’, ‘hen’, ‘ostrich’, ‘brambling’, ‘goldfinch’, ‘house finch’, ‘junco’, ‘indigo bunting’, ‘robin’, ‘bulbul’, ‘jay’, ‘magpie’, ‘chickadee’]
Initializing the DNN Module
Now before we can use the DNN Module we must initialize it using one of the following functions.
Caffe Modles:cv2.dnn.readNetFromCaffeTensorflow Models:cv2.dnn.readNetFromTensorFlowPytorch Models:cv2.dnn.readNetFromTorch
As you can see the function you use depends upon the Original Architecture the model was trained on.
Since we’ll be using a DenseNet121 which was trained using Caffe so our function will be:
retval = cv2.dnn.readNetFromCaffe( prototxt[, caffeModel] )
Params:
prototxt:Path to the .prototxt file, this is the text description of the architecture of the model.caffeModel:path to the .caffemodel file, this is your actual trained neural network model, it contains all the weights/parameters of the model. This is usually several MBs in size.
Note: If you load the model and proto file via readNetFromTensorFlow then the order of architecture and model inputs are reversed.
# Load the Model Weights.
weights = 'model/DenseNet_121.caffemodel'

# Load the Model Architecture.
architecture ='model/DenseNet_121.prototxt.txt'

# Here we are reading pre-trained caffe model with its architecture
net = cv2.dnn.readNetFromCaffe(architecture,weights)
Read An Image
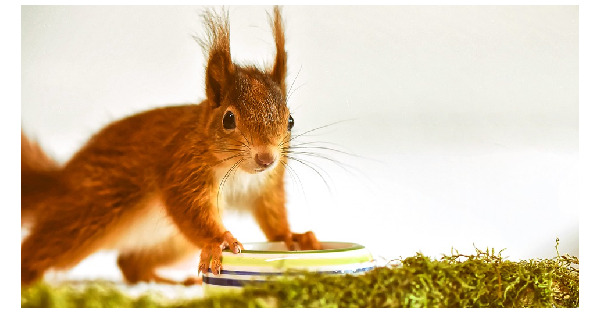
Let’s read an example image and display it with matplotlib imshow
# Load the input image
image = cv2.imread('images/jemma2.jpg')

# Display the image
plt.figure(figsize=(10,10))
plt.imshow(image[:,:,::-1]);plt.axis("off");
Pre-processing the image
Now before you pass an image in the network you need to preprocess it, this means resizing the image to the size it was trained on, for many networks, this is 224×224, in pre-processing step you also do other things like Normalize the image (make the range of intensity values between 0-1) and mean subtraction, etc. These are all the steps the authors did on the images that were used during model training.
Fortunately, In OpenCV, you have a function called cv2.dnn.blobFromImage() which most of the time takes care of all the pre-processing for you.
blob = cv2.dnn.blobFromImage(image[, scalefactor[, size[, mean[, swapRB[, crop]]]]])
Params:
ImageInput image.ScalefactorUsed to normalize the image. This value is multiplied by the image, value of 1 means no scaling is done.- Size The size to which the image will be resized to, this depends upon the each model.
- Mean These are mean R,G,B Channel values from the whole dataset and these are subtracted from the image’s R,G,B respectively, this gives illumination invariance to the model.
- swapRB Boolean flag (false by default) this indicates weather swap first and last channels in 3-channel image is necessary.
- crop flag which indicates whether the image will be cropped after resize or not. If crop is true, input image is resized so one side after resize is equal to the corresponding dimension in size and another one is equal or larger. Then, a crop from the center is performed. If crop is false, direct resize without cropping and preserving aspect ratio is performed.
blob = cv2.dnn.blobFromImage(image, 0.017, (224, 224), (103.94,116.78,123.68))So After this function, we get a 4d blob, this is what we’ll pass to the network.
print(blob.shape)(1, 3, 224, 224)
Note: There is also blobFromImages() which does the same thing but with multiple images.
Input the Blob Image to the Network
Here you’re setting up the blob image as the input to the network.
# Passing the blob as input through the network
net.setInput(blob)
Forward Pass
Here the actual computation will take place, Most of the time in your whole pipeline will be taken here. Here your image will go through all the model parameters and in the end, you will get the output of the classifier.
%%time
Output = net.forward()
Wall time: 166 ms
# Length of the number of predictions
print("Total Number of Predictions are: {}".format(len(Output[0])))
Total Number of Predictions are: 1000
# Look at few outputs
Output[0][:4]
array([[[-2.0572357 ]], [[-0.18754716]], [[-3.314731 ]], [[-6.196114 ]]], dtype=float32)
Apply Softmax Function to get Probabilities
By looking at the output, you can tell that the model has returned a set of scores for each class but we need Probabilities between 0-1 for each class. We can get them by applying a softmax function on the scores.
# Reshape the Output so its a single dimensional vector
new_Output = Output.reshape(len(Output[0][:]))

# Convert the scores to class probabilities between 0-1 by applying softmax
expanded = np.exp(new_Output - np.max(new_Output))
prob =  expanded / expanded.sum()
# Look at few probablities
prob[:4]
array([5.7877337e-06, 3.7540856e-05, 1.6458317e-06, 9.2260699e-08], dtype=float32)
The Maximum probability is the confidence of our target class.
# Maximum Probabilitry for this image
conf = np.max(prob)
print(conf)
0.59984004
The index Containing the maximum confidence/probability is the index of our target class.
# Index of Class with the maximum Probability.
index = np.argmax(prob)
print(index)
331
By putting the index from above into our labels list we can get the name of our target class.
# Name of the Class with the maximum probability
label = CLASSES[index]
print(label)
hare
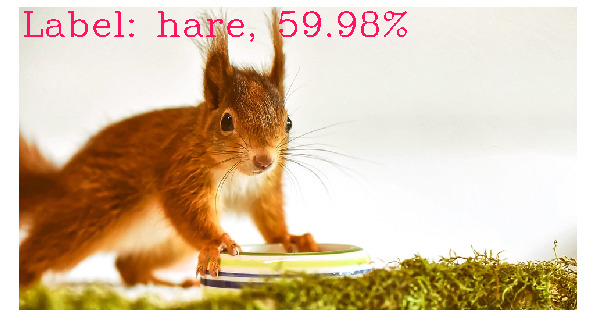
As we have successfully performed the classification, now we will just annotate the image with the information we have.
imagec = image.copy()

cv2.putText(imagec, "Label: {}, {:.2f}%".format(label, conf *100), (5, 50),  cv2.FONT_HERSHEY_COMPLEX, 2, (100, 20, 255), 2)

plt.figure(figsize=(10,10))
plt.imshow(imagec[:,:,::-1]);plt.axis("off");
Creating Functions
Now that we have understood step by step how to create the pipeline for classification using OpenCV’s DNN module, we’ll now create functions that do all the above in a single step. In short, we will be creating the following two functions.
Initialization Function: This function will contain parts of the network that will be set once, like loading the model.
Main Function: This function will contain all the rest of the code from preprocessing to postprocessing, it will also have the option to either return the image or display it with matplotlib.
Initialization Function
This method will be run once and it will initialize the network with the required files.
def init_classify(weights_name = 'DenseNet_121.caffemodel', architecture_name = 'DenseNet_121.prototxt.txt'):

    # Set global variables
    global net, classes

    base_path = 'model'

    # Read the Classes
    rows = open(os.path.join(base_path,'synset_words.txt')).read().strip().split("n")

    # Load and split  the classes
    classes = [r[r.find(" ") + 1:].split(",")[0] for r in rows]

    # Load the wieght and architeture of the model
    weights = os.path.join(base_path, weights_name)
    architecture = os.path.join(base_path, architecture_name)

    # Intialize the model
    net = cv2.dnn.readNetFromCaffe(architecture, weights)
Main Method
returndata is set to `True` when we want to perform classification on video.
def classify(image, returndata=False, size=1,):

    # Pre-process the image
    blob = cv2.dnn.blobFromImage(image, 0.017, (224, 224), (103.94,116.78,123.68))

    # Input blob image into network
    net.setInput(blob)

    # Forward pass
    Output = net.forward()

    # Reshape the Output so its a single dimensional vector
    new_Output = Output.reshape(len(Output[0][:]))

    # Convert the scores to class probabilities between 0-1.
    expanded = np.exp(new_Output - np.max(new_Output))
    prob =  expanded / expanded.sum()

    # Get Highest probable class.
    conf= np.max(prob)

    # Index of Class with the maximum Probability.
    index = np.argmax(prob)

    # Name of the Class with the maximum probability
    label = classes[index]

    text = "Label: {}, {:.2f}%".format(label, conf*100)

    cv2.putText(image, text, (5, size*26),  cv2.FONT_HERSHEY_COMPLEX, size, (100, 20, 255), 3)

    if  returndata:
        return image, text

    else:
        plt.figure(figsize=(10,10))
        plt.imshow(image[:,:,::-1]);plt.axis("off");
Initialize the Classifier
Calling our initializer to initialize the network.
init_classify()Using our Classifier Function
Now we can call our classifier function and test on multiple images.
image = cv2.imread('images/spcar.JPG')
classify(image)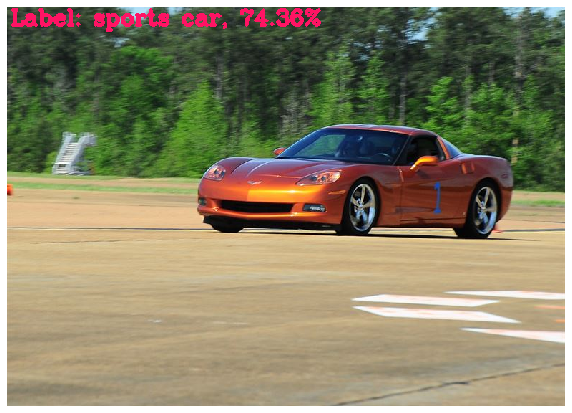
image = cv2.imread('images/cat.jpeg')
classify(image,size=2)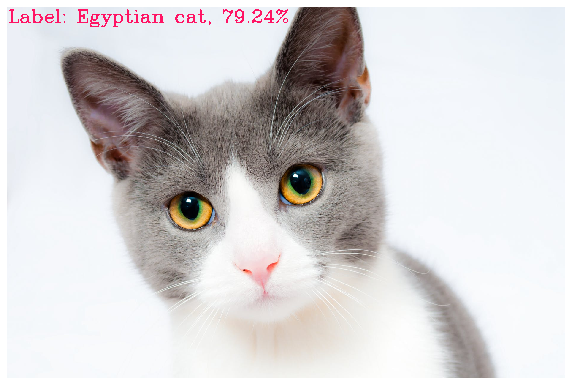
image = cv2.imread('images/green_lizard.jpg')
classify(image)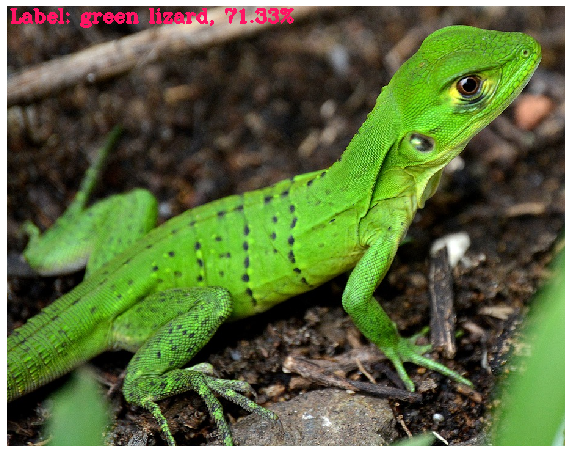
Real time Image Classification
If you want to this classifier in real-time then here is the code for that.
# Initialize fps to 0
fps = 0

# Load the classes and model
init_classify()

# Initialize the webcame
cap=cv2.VideoCapture(0)

while(True):

    # Fetch the inital time in order to find FPS
    start_time = time.time()

    # Read the frame from camera
    ret, frame=cap.read()

    # If camera is not working break the loop
    if not ret:
        break

    # Flip the frame, laterally
    image = cv2.flip(frame,1)

    # Classify the objects in frames
    image,_ = classify(image, returndata=True)

    # Display the classified object of frames
    cv2.putText(image, 'FPS: {:.2f}'.format(fps), (470, 20), cv2.FONT_HERSHEY_COMPLEX,0.8, (255, 20, 55), 2)

    # Display the window
    cv2.imshow("Image",image)

    # Calculate FPS
    fps = (1.0 / (time.time() - start_time))

    # Press `q` in order to close the window
    k = cv2.waitKey(1)
    if k == ord('q'):
        break

# Release the camera and destroy all opened windows
cap.release()
cv2.destroyAllWindows()
Important Details Regarding the DNN module
Let’s discuss some interesting details and some tips to fully utilize the DNN module.
Where to get the pre-trained Models:
Earlier I mentioned that you can get other pre-trained models, so where are they?
The best place to get pre-trained models is here. This page is a wiki for Deep learning with OpenCV, you will find models that have been tested by the OpenCV team.
There are a variety of models present here, for things like Classification, Pose Detection, Colorization, Segmentation, Face recognition, text detection, style transfer, and more. You can take models from any of the above 5 frameworks.
Just click on the models to go to their repo and download them from there. Note: The models listed on the page above are only the tested models, in theory, you can almost take any pre-trained model and use it in OpenCV.
A faster and easier way to download models is to go here. Now, this is a python script that will let you download not only the most commonly used models but also some State of the Art ones like Yolo v4 etc. You can download this script and then run from the command line. Alternatively, if you’re in a rush and just one specific model then you can take the downloadable URL of any model and download it.

After downloading the model, you will need a couple of more things before you can actually use the model in the OpenCV dnn module.
You’re now probably familiar with those things, so yeah you will need the model configuration file like the prototxt file we just used with our Caffe model above. You will also need class labels, now for classification problems, models are usually trained on the ImageNet dataset so we needed synset_word.txt file, for Object detection you will find models trained on COCO or Pascal VOC dataset. And similarly, other tasks may require other files.
So where are all these files present?
You will find most of these configuration files present here and the class names here. If the configuration file you’re looking for is not present in the above links then I would recommend that you look at the GitHub repo of the model, the files would be present there. Otherwise, you have to create it yourself. (More on this later)
After getting the configuration files, the only thing you need is the pre-processing parameters that go in blobFromImage. E.g. the mean subtraction values, scaling params, etc.
You can get that information from here. Now, this script only contains parameter details for a few popular models.
So how do you get the details for other models?
For that you would need to go to the repo of the model and look in the ReadMe section, the authors usually put that information there.
For e.g. If I visit the GitHub repo of the Human Pose Estimation model using this link which I got from the model downloading script.

By scrolling down the readme I can find these details here:

Note: These details are not always present in the Readme and sometimes you have to do quite some digging before you can find these parameters.
What to do if there is no GitHub repo link with the model, for e.g. this shuffleNet model does not have a GitHub link, in that case, I can see that the framework is ONNX.
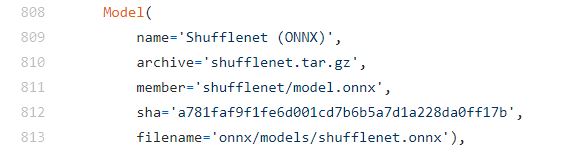
So now I will visit the ONNX model zoo repo and find that model.

After clicking on the model I will find its readme and then its preprocessing steps.

Notice that this model contains some preprocessing steps that are not supported by blobfromImage function. So this could happen and at times you would need to write custom preprocessing steps without using blobfromImage function, for e.g. in our Super Resolution post, I had to write a custom pre-processing pipeline for the network.
How to use our own Custom Trained Networks
Now that we have learned to use different models, you might wonder exactly how can we use our own custom-trained models. So the thing is you can’t directly plug a trained network in a DNN module but you need to perform some operations to get a configuration file, which is why we needed a prototxt file along with the model.
Fortunately, In the next two blog posts, I plan to cover exactly this topic and show you how to use a custom trained classifier and a custom trained Detection network.
For now, you can take a look at this page which briefly describes how you can use models trained with Tensorflow Object Detection API in OpenCV.
One thing to note is that not all networks are supported by the DNN module, this is because the DNN module supports some 30+ layer types, these layer names can be found at the wiki here. So if a model contains layers that are not among the supported layers then it won’t run, this is not a major issue as most common layers used in deep learning models are supported.
Also OpenCV provides a way for you to define your own custom layers.
Using GPU’s and Faster Backends to speed up OpenCV DNN Module
By default OpenCV’s DNN deep learning module runs on the default C++ implementation which itself is pretty fast but OpenCV further allows you to change this backend to increase the speed even more.
Option 1: Use NVIDIA GPU with CUDA backend in the DNN module:
If you have an Nvidia GPU present then great, you can use that with the DNN module, you can follow my OpenCV source installation guide to configure your NVIDIA GPU for OpenCV and learn how to use it. This will make your networks run several times faster.
Option 2: Use OpenCL based INTEL GPU’s:
If you have an OpenCL-based GPU then you can use that as a backend, although this increases speed but in my experience, I’ve seen speed gains only in 32 bit systems. To use the OpenCL as a backend you can see the last section of my OpenCV source installation section linked above.
Option 3: Use Halide Backend:
As described in this post from learnOpenCV.com, for some time in the past using the halide backend increased the speed but then OpenCV engineer’s optimized the default C++ implementation so much that the default implementation actually got faster. So I don’t see a reason to use this backend now, Still here’s how you configure halide as a backend.
Option 4: Use Intel’s Deep Learning Inference Engine backend:
Intel’s Deep Learning Inference Engine backend is part of the OpenVINO toolkit, OpenVINO stands for Open Visual Inferencing and Neural Network Optimization. OpenVINO is designed by Intel to speed up inference with neural networks, especially for tasks like classification, detection, etc. OpenVINO speeds up by optimizing the model in a hardware-agnostic way. You can learn to install OpenVINO here and here’s a nice tutorial for it.


Summary:
In today’s tutorial, we went over a number of things regarding OpenCV’s DNN module. From using pre-trained models to Optimizing for faster inference speed.
We also learned to perform a classification pipeline using densenet121.
This post should serve as an excellent guide for anyone trying to get started in Deep learning using OpenCV’s DNN module.
Finally, OpenCV’s DNN repo contains an example python script to run common networks like classification, text, object detection, and more. You can start utilizing the DNN module by using these scripts and here are a few DNN Tutorials by OpenCV.
The main contributor for the DNN module in OpenCV is Dmitry Kurtaev and formerly it was Aleksandr Rybnikov, so big thanks to them and the rest of the contributors for making such a great module.
I hope you enjoyed today’s tutorial, feel free to comment and ask questions.
You can reach out to me personally for a 1 on 1 consultation session in AI/computer vision regarding your project. Our talented team of vision engineers will help you every step of the way. Get on a call with me directly here.
Ready to seriously dive into State of the Art AI & Computer Vision?
Then Sign up for these premium Courses by Bleed AI
You can reach out to me personally for a 1 on 1 consultation session in AI/computer vision regarding your project. Our talented team of vision engineers will help you every step of the way. Get on a call with me directly here.


Salam Alaykom,
Nice unique useful article,
Keep up the good work.
Thanks and best regards