Watch Video Here
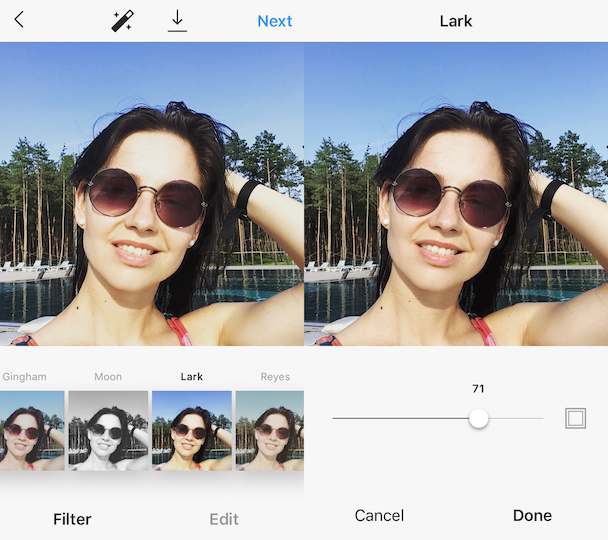
You must have tried or heard of the famous Instagram filters, if you haven’t then … well 🤔 please just let me know the year you are living in, along with the address of your cave xD in the comments section, I would love to visit you (I mean visit the past) someday. These filters are everywhere nowadays, every social media person is obsessed with these.

Being a vison/ml practitioner, you must have thought about creating one or at least have wondered how these filters completely change the vibe of an image. If yes, then here at Bleed AI we have published just the right series for you (Yes you heard right a complete series), in which you will learn to create some fascinating photo filters along with a user interface similar to the Instagram filter selection screen using OpenCV in python.
In Instagram (or any other photo filter application), we touch on the screen to select different filters from a list of filters previews to apply them to an image, similarly, if you want to select a filter (using a mouse) and apply it to an image in python, you might want to use OpenCV, specifically OpenCV’s Mouse events, and these filter applications normally also provide a slider to adjust the intensity of the selected filter, we can create something similar in OpenCV using a trackbar.
So in this tutorial, we will cover all the nitty-gritty details required to use Mouse Events (to select a filter) and TrackBars (to control the intensity of filters) in OpenCV, and to kill the dryness we will learn all these concepts by building some mini-applications, so trust me you won’t get bored.
This is the first tutorial in our 3 part Creating Instagram Filters series. All three posts are titled as:
- Part 1: Working With Mouse & Trackbar Events in OpenCV (Current tutorial)
- Part 2: Working With Lookup Tables & Applying Color Filters on Images & Videos
- Part 3: Designing Advanced Image Filters in OpenCV
Outline
This tutorial can be split into the following parts:
Alright, let’s get started.
Download Code:
[optin-monster-inline slug=”iron2yjgfsx9eie9upav”]
Import the Libraries
First, we will import the required libraries.
import cv2
import numpy as np
Introduction to Mouse Events in OpenCV
Well, mouse events in OpenCV are the events that are triggered when a user interacts with an OpenCV image window using a mouse. OpenCV allows you to capture different types of mouse events like left-button down, left-button up, left-button double-click, etc, and then whenever these events occur, you can then execute some operation(s) accordingly, e.g. apply a certain filter.
Here are the most common mouse events that you can work with
| Event ID | Enumerator | Event Indication |
|---|---|---|
| 0 | cv2.EVENT_MOUSEMOVE | Indicates that the mouse pointer has moved over the window. |
| 1 | cv2.EVENT_LBUTTONDOWN | Indicates that the left mouse button is pressed. |
| 2 | cv2.EVENT_RBUTTONDOWN | Indicates that the right mouse button is pressed. |
| 3 | cv2.EVENT_MBUTTONDOWN | Indicates that the middle mouse button is pressed. |
| 4 | cv2.EVENT_LBUTTONUP | Indicates that the left mouse button is released. |
| 5 | cv2.EVENT_RBUTTONUP | Indicates that the right mouse button is released. |
| 6 | cv2.EVENT_MBUTTONUP | Indicates that the middle mouse button is released. |
| 7 | cv2.EVENT_LBUTTONDBLCLK | Indicates that the left mouse button is double-clicked. |
| 8 | cv2.EVENT_RBUTTONDBLCLK | Indicates that the right mouse button is double-clicked. |
| 9 | cv2.EVENT_MBUTTONDBLCLK | Indicates that the middle mouse button is double-clicked. |
I have only mentioned the most commonly triggered events with their Event IDs and Enumerators. You can check cv2.MouseEventTypes for the remainings.
Now for capturing these events, we will have to attach an event listener to an image window, so in simple words; we are just gonna be telling the OpenCV library to start reading the mouse input on an image window, this can be done easily by using the cv2.setMouseCallback() function.
Function Syntax:
Parameters:
winname:– The name of the window with which we’re gonna attach the mouse event listener.onMouse:– The method (callback function) that is going to be called every time a mouse event is captured.userdata:(optional) – A parameter passed to the callback function.
Now before we could use the above function two things should be done, first we must create a window beforehand since we will have to pass the window name to the cv2.setMouseCallback() function. For this we will use the cv2.namedWindow(winname) function.
# Create a named resizable window.
# This will create and open up a OpenCV image window.
# Minimize the window and run the next cells.
# Donot close this window.
cv2.namedWindow('Webcam Feed', cv2.WINDOW_NORMAL)
And the next thing we must do is to create a method (callback function) that is going to be called whenever a mouse event is captured. And this method by default will have a couple of arguments containing info related to the captured mouse event.
Creating a Paint Application utilizing Mouse Events
Now we will create a callback function drawShapes(), that will draw a circle or rectangle on an empty canvas (i.e. just an empty black image) at the location of the mouse cursor whenever the left or right mouse button is pressed respectively and clear the canvas whenever the middle mouse button is pressed.
def drawShapes(event, x, y, flags, userdata):
    '''
    This function will draw circle and rectangle on a canvas and clear it based
    on different mouse events.
    Args:
        event:    The mouse event that is captured.
        x:        The x-coordinate of the mouse pointer position on the window.
        y:        The y-coordinate of the mouse pointer position on the window.
        flags:    It is one of the MouseEventFlags constants.
        userdata: The parameter passed from the `cv2.setMouseCallback()` function.
    '''

    # Access the canvas from outside of the current scope.
    global canvas

    # Check if the left mouse button is pressed.
    if event == cv2.EVENT_LBUTTONDOWN:

        # Draw a circle on the current location of the mouse pointer.
        cv2.circle(img=canvas, center=(x, y), radius=50,
                   color=(113,182,255), thickness=-1)

    # Check if the right mouse button is pressed.
    elif event == cv2.EVENT_RBUTTONDOWN:

        # Draw a rectangle on the current location of the mouse pointer.
        cv2.rectangle(img=canvas, pt1=(x-50,y-50), pt2=(x+50,y+50),
                      color=(113,182,255), thickness=-1)

    # Check if the middle mouse button is pressed.
    elif event == cv2.EVENT_MBUTTONDOWN:

        # Clear the canvas.
        canvas = np.zeros(shape=(int(camera_video.get(cv2.CAP_PROP_FRAME_HEIGHT)),
                                 int(camera_video.get(cv2.CAP_PROP_FRAME_WIDTH)), 3),
                          dtype=np.uint8)
Now it’s time to draw circles and rectangles on a webcam feed utilizing mouse events in real-time, as we have created a named window Webcam Feed and a callback function drawShapes() (to draw on a canvas), so we are all set to use the function cv2.setMouseCallback() to serve the purpose.
# Initialize the VideoCapture object to read from the webcam.
camera_video = cv2.VideoCapture(0)
camera_video.set(3,1280)
camera_video.set(4,960)

# Initialize a canvas to draw on.
canvas = np.zeros(shape=(int(camera_video.get(cv2.CAP_PROP_FRAME_HEIGHT)),
                         int(camera_video.get(cv2.CAP_PROP_FRAME_WIDTH)), 3),
                  dtype=np.uint8)

# Create a named resizable window.
# This line is added to re-create the window,
# in case you have closed the window created in the cell above.
cv2.namedWindow('Webcam Feed', cv2.WINDOW_NORMAL)

# Attach the mouse callback function to the window.
cv2.setMouseCallback('Webcam Feed', drawShapes)

# Iterate until the webcam is accessed successfully.
while camera_video.isOpened():

    # Read a frame.
    ok, frame = camera_video.read()

    # Check if frame is not read properly then
    # continue to the next iteration to read the next frame.
    if not ok:
        continue

    # Update the pixel values of the frame with the canvas's values at the indexes where canvas!=0
    # i.e. where canvas is not black and something is drawn there.
    # In short, this will copy the shapes from canvas to the frame.
    frame[np.mean(canvas, axis=2)!=0] = canvas[np.mean(canvas, axis=2)!=0]

    # Display the frame.
    cv2.imshow('Webcam Feed', frame)

    # Check if 'ESC' is pressed and break the loop.
    if cv2.waitKey(20) & 0xFF == 27:
        break

# Release the VideoCapture Object and close the windows.
camera_video.release()
cv2.destroyAllWindows()
Output Video:
Working as expected! but there’s a minor issue, we can only draw fixed size shapes so let’s try to overcome this limitation by creating another callback function drawResizableShapes() that will use the cv2.EVENT_MOUSEMOVE event, to measure the required size of a shape in real-time meaning the user will have to drag the mouse while pressing the right or left mouse button to draw shapes of different sizes on the canvas.
def drawResizableShapes(event, x, y, flags, userdata):
    '''
    This function will draw circle and rectangle on a canvas and clear it
    on different mouse events.
    Args:
        event:    The mouse event that is captured.
        x:        The x-coordinate of the mouse pointer position on the window.
        y:        The y-coordinate of the mouse pointer position on the window.
        flags:    It is one of the MouseEventFlags constants.
        userdata: The parameter passed from the `cv2.setMouseCallback()` function.
    '''

    # Access the needed variables from outside of the current scope.
    global start_x, start_y, canvas, draw_shape

    # Check if the left mouse button is pressed.
    if event == cv2.EVENT_LBUTTONDOWN:

        # Enable the draw circle mode.
        draw_shape = 'Circle'

        # Set the start x and y to the current x and y values.
        start_x = x
        start_y = y

    # Check if the left mouse button is pressed.
    elif event == cv2.EVENT_RBUTTONDOWN:

        # Enable the draw rectangle mode.
        draw_shape = 'Rectangle'

        # Set the start x and y to the current x and y values.
        start_x = x
        start_y = y

    # Check if the mouse has moved on the window.
    elif event == cv2.EVENT_MOUSEMOVE:

        # Get the pointer x-coordinate distance between start and current point.
        pointer_pos_diff_x = abs(start_x-x)

        # Get the pointer y-coordinate distance between start and current point.
        pointer_pos_diff_y = abs(start_y-y)

        # Check if the draw circle mode is enabled.
        if draw_shape == 'Circle':

            # Draw a circle on the start x and y coordinates,
            # of size depending upon the distance between start,
            # and current x and y coordinates.
            cv2.circle(img = canvas, center = (start_x, start_y),
                       radius = pointer_pos_diff_x + pointer_pos_diff_y,
                       color = (113,182,255), thickness = -1)

        # Check if the draw rectangle mode is enabled.
        elif draw_shape == 'Rectangle':

            # Draw a rectangle on the start x and y coordinates,
            # of size depending upon the distance between start,
            # and current x and y coordinates.
            cv2.rectangle(img=canvas, pt1=(start_x-pointer_pos_diff_x,
                                           start_y-pointer_pos_diff_y),
                          pt2=(start_x+pointer_pos_diff_x, start_y+pointer_pos_diff_y),
                          color=(113,182,255), thickness=-1)

    # Check if the left or right mouse button is released.
    elif event == cv2.EVENT_LBUTTONUP or event == cv2.EVENT_RBUTTONUP:

        # Disable the draw shapes mode.
        draw_shape = None

    # Check if the middle mouse button is pressed.
    elif event == cv2.EVENT_MBUTTONDOWN:

        # Clear the canvas.
        canvas = np.zeros(shape=(int(camera_video.get(cv2.CAP_PROP_FRAME_HEIGHT)),
                                 int(camera_video.get(cv2.CAP_PROP_FRAME_WIDTH)), 3),
                          dtype=np.uint8)
Now we are all set to overcome that same size limitation, we will utilize this drawResizableShapes() callback function created above, to draw circles and rectangles of various sizes on a webcam feed utilizing mouse events.
# Initialize the VideoCapture object to read from the webcam.
camera_video = cv2.VideoCapture(0)
camera_video.set(3,1280)
camera_video.set(4,960)

# Initialize a canvas to draw on.
canvas = np.zeros(shape=(int(camera_video.get(cv2.CAP_PROP_FRAME_HEIGHT)),
                         int(camera_video.get(cv2.CAP_PROP_FRAME_WIDTH)), 3),
                  dtype=np.uint8)

# Create a named resizable window.
cv2.namedWindow('Webcam Feed', cv2.WINDOW_NORMAL)

# Attach the mouse callback function to the window.
cv2.setMouseCallback('Webcam Feed', drawResizableShapes)

# Initialize variables to store start mouse pointer x and y location.
start_x = 0
start_y = 0

# Initialize a variable to store the draw shape mode.
draw_shape = None

# Iterate until the webcam is accessed successfully.
while camera_video.isOpened():

    # Read a frame.
    ok, frame = camera_video.read()

    # Check if frame is not read properly then
    # continue to the next iteration to read the next frame.
    if not ok:
        continue

    # Update the pixel values of the frame with the canvas's values at the indexes where canvas!=0
    # i.e. where canvas is not black and something is drawn there.
    # In short, this will copy the shapes from canvas to the frame.
    frame[np.mean(canvas, axis=2)!=0] = canvas[np.mean(canvas, axis=2)!=0]

    # Display the frame.
    cv2.imshow('Webcam Feed', frame)

    # Check if 'ESC' is pressed and break the loop.
    if cv2.waitKey(20) & 0xFF == 27:
        break

# Release the VideoCapture Object and close the windows.
camera_video.release()
cv2.destroyAllWindows()
Output Video:
Cool! right? feels like a mini paint application but still, something’s missing. How about adding a feature for users to paint (draw anything) with different colors to select from, and erase the drawings, on the webcam feed. All this just by utilizing mouse events in OpenCV, feels like a plan right? let’s create it. Again first we will have to create a callback function draw() that will carry all the heavy burden of drawing, erasing, and selecting paint color utilizing mouse events.
def draw(event, x, y, flags, userdata):
    '''
    This function will select paint color, draw and clear a canvas
    based on different mouse events.
    Args:
        event:    The mouse event that is captured.
        x:        The x-coordinate of the mouse pointer position on the window.
        y:        The y-coordinate of the mouse pointer position on the window.
        flags:    It is one of the MouseEventFlags constants.
        userdata: The parameter passed from the `cv2.setMouseCallback()` function.
    '''

    # Access the needed variables from outside of the current scope.
    global prev_x, prev_y, canvas, mode, color

    # Check if the left mouse button is double-clicked.
    if event == cv2.EVENT_LBUTTONDBLCLK:

        # Check if the mouse pointer y-coordinate is less than equal to a certain threshold.
        if y <= 10 + rect_height:

            # Check if the mouse pointer x-coordinate is over the orange color rectangle.
            if x>(frame_width//1.665-rect_width//2) and \
            x<(frame_width//1.665-rect_width//2)+rect_width:

                # Update the color variable value to orange.
                color = 113, 182, 255

            # Check if the mouse pointer x-coordinate is over the pink color rectangle.
            elif x>(int(frame_width//2)-rect_width//2) and \
            x<(int(frame_width//2)-rect_width//2)+rect_width:

                # Update the color variable value to pink.
                color = 203, 192, 255

            # Check if the mouse pointer x-coordinate is over the yellow color rectangle.
            elif x>(int(frame_width//2.5)-rect_width//2) and \
            x<(int(frame_width//2.5)-rect_width//2)+rect_width:

                # Update the color variable value to yellow.
                color = 0, 255, 255

    # Check if the left mouse button is pressed.
    elif event == cv2.EVENT_LBUTTONDOWN:

        # Enable the paint mode.
        mode = 'Paint'

    # Check if the right mouse button is pressed.
    elif event == cv2.EVENT_RBUTTONDOWN:

        # Enable the paint mode.
        mode = 'Erase'

    # Check if the left or right mouse button is released.
    elif event == cv2.EVENT_LBUTTONUP or event == cv2.EVENT_RBUTTONUP:

        # Disable the active mode.
        mode = None

        # Reset by updating the previous x and y values to None.
        prev_x = None
        prev_y = None

    # Check if the mouse has moved on the window.
    elif event == cv2.EVENT_MOUSEMOVE:

        # Check if a mode is enabled and the previous x and y donot have valid values.
        if mode and (not (prev_x and prev_y)):
            # Set the previous x and y to the current x and y values.
            prev_x = x
            prev_y = y
        # Check if the paint mode is enabled.
        if mode == 'Paint':

            # Draw a line from previous x and y to the current x and y.
            cv2.line(img=canvas, pt1=(x,y), pt2=(prev_x,prev_y), color=color, thickness=10)

        # Check if the erase mode is enabled.
        elif mode == 'Erase':

            # Draw a black line from previous x and y to the current x and y.
            # This will erase the paint between previous x and y and the current x and y.
            cv2.line(img=canvas, pt1=(x,y), pt2=(prev_x,prev_y), color=(0,0,0), thickness=20)

        # Update the previous x and y to the current x and y values.
        prev_x = x
        prev_y = y

    # Check if the middle mouse button is pressed.
    elif event == cv2.EVENT_MBUTTONDOWN:

        # Clear the canvas.
        canvas = np.zeros(shape=(int(camera_video.get(cv2.CAP_PROP_FRAME_HEIGHT)),
                                 int(camera_video.get(cv2.CAP_PROP_FRAME_WIDTH)), 3),
                          dtype=np.uint8)
Now that we have created a drawing callback function draw(), it's time to use it to create that paint application we had in mind, the application will draw, erase on a webcam feed with different colors utilizing mouse events in real-time.
# Initialize the VideoCapture object to read from the webcam.
camera_video = cv2.VideoCapture(0)
camera_video.set(3,1280)
camera_video.set(4,960)

# Initialize a canvas to draw on.
canvas = np.zeros(shape=(int(camera_video.get(cv2.CAP_PROP_FRAME_HEIGHT)),
                         int(camera_video.get(cv2.CAP_PROP_FRAME_WIDTH)), 3),
                  dtype=np.uint8)

# Create a named resizable window.
cv2.namedWindow('Webcam Feed', cv2.WINDOW_NORMAL)

# Attach the mouse callback function to the window.
cv2.setMouseCallback('Webcam Feed', draw)

# Initialize variables to store previous mouse pointer x and y location.
prev_x = None
prev_y = None

# Initialize a variable to store the active mode.
mode = None

# Initialize a variable to store the color value.
color = 203, 192, 255

# Iterate until the webcam is accessed successfully.
while camera_video.isOpened():

    # Read a frame.
    ok, frame = camera_video.read()

    # Check if frame is not read properly then
    # continue to the next iteration to read the next frame.
    if not ok:
        continue

    # Get the height and width of the frame of the webcam video.
    frame_height, frame_width, _ = frame.shape

    # Get the colors rectangles previews height and width.
    rect_height, rect_width = int(frame_height/10), int(frame_width/10)

    # Update the pixel values of the frame with the canvas's values at the indexes where canvas!=0
    # i.e. where canvas is not black and something is drawn there.
    # In short, this will copy the drawings from canvas to the frame.
    frame[np.mean(canvas, axis=2)!=0] = canvas[np.mean(canvas, axis=2)!=0]

    # Overlay the colors previews rectangles over the frame.
    ###################################################################################################################

    # Overlay the orange color preview on the frame.
    cv2.rectangle(img=frame, pt1=(int((frame_width//1.665)-rect_width//2), 10),
                  pt2=(int((frame_width//1.665)+rect_width//2), 10+rect_height),
                  color=(113, 182, 255), thickness=-1)

    # Draw an outline around the orange color preview.
    cv2.rectangle(img=frame, pt1=(int((frame_width//1.665)-rect_width//2), 10),
                  pt2=(int((frame_width//1.665)+rect_width//2), 10+rect_height),
                  color=(255, 255, 255), thickness=2)

    # Overlay the pink color preview on the frame.
    cv2.rectangle(img=frame, pt1=(int((frame_width//2)-rect_width//2), 10),
                  pt2=(int((frame_width//2)+rect_width//2), 10+rect_height),
                  color=(203, 192, 255), thickness=-1)

    # Draw an outline around the pink color preview.
    cv2.rectangle(img=frame, pt1=(int((frame_width//2)-rect_width//2), 10),
                  pt2=(int((frame_width//2)+rect_width//2), 10+rect_height),
                  color=(255, 255, 255), thickness=2)

    # Overlay the yellow color preview on the frame.
    cv2.rectangle(img=frame, pt1=(int((frame_width//2.5)-rect_width//2), 10),
                  pt2=(int((frame_width//2.5)+rect_width//2), 10+rect_height),
                  color=(0, 255, 255), thickness=-1)

    # Draw an outline around the yellow color preview.
    cv2.rectangle(img=frame, pt1=(int((frame_width//2.5)-rect_width//2), 10),
              pt2=(int((frame_width//2.5)+rect_width//2), 10+rect_height),
              color=(255, 255, 255), thickness=2)

    ###################################################################################################################

    # Display the frame.
    cv2.imshow('Webcam Feed', frame)

    # Check if 'ESC' is pressed and break the loop.
    if cv2.waitKey(20) &  0xFF == 27:
        break

# Release the VideoCapture Object and close the windows.
camera_video.release()
cv2.destroyAllWindows()
Output Video:
Awesome! Everything went according to the plan, the application is working fine. But there's a minor issue that we have limited options to choose the paint color from. We can add more colors previews on the frame and add code to select those colors using mouse events but that will take forever, I wish there was a simpler way.
Working with TrackBars in OpenCV
Well, there's a way to get around this i.e., using TrackBars, as I mentioned at the beginning of the tutorial, these are like sliders with a minimum and a maximum value and allow users to slide across and select a value. These are extremely beneficial in adjusting the parameters of things in code in real-time instead of manually changing them and running the code again and again. For our case, these can be very handy to choose filters intensity and paint color (RGB) value in real-time.
OpenCV allows creating trackbars by using the cv2.createTrackbar() function. The procedure is pretty similar to that of cv2.setMouseCallback() function, first we will have to create a namedwindow, then create a method (i.e. called onChange in the slider) and finally attach the trackbar to that window using the function cv2.createTrackbar().
Function Syntax:
cv2.createTrackbar(trackbarname,winname,value,count,onChange)
Parameters:
trackbarname:It is the name of the created trackbar.winname:It is the name of the window that will be attached to the created trackbar.value:It is the starting value for the slider. When the program starts, this is the point where the slider will be at.countIt is the max value for the slider. The min value is always 0.onChange:It is the method that is called whenever the position of the slider is changed.
And to get the value of the slider we will have to use another function cv2.getTrackbarPos().
Function Syntax:
Parameters:
Trackbar_Name:It is the name of the trackbar you wish to get the value of.winname:It is the name of the window that the trackbar is attached to.
Now let's create a simple python script that will utilize trackbars to move a circle around in a webcam feed window and adjust its radius in real-time.
# Initialize the VideoCapture object to read from the webcam.
camera_video = cv2.VideoCapture(0)
camera_video.set(3,1280)
camera_video.set(4,960)

# Create a named resizable window.
cv2.namedWindow('Webcam Feed', cv2.WINDOW_NORMAL)

# Get the height and width of the frame of the webcam video.
frame_height = int(camera_video.get(cv2.CAP_PROP_FRAME_HEIGHT))
frame_width = int(camera_video.get(cv2.CAP_PROP_FRAME_WIDTH))

# Create the onChange function for the trackbar since its mandatory.
def nothing(x):
    pass

# Create trackbar named Radius with the range [0-100].
cv2.createTrackbar('Radius: ', 'Webcam Feed', 50, 100, nothing)

# Create trackbar named x with the range [0-frame_width].
cv2.createTrackbar('x: ', 'Webcam Feed', 50, frame_width, nothing)

# Create trackbar named y with the range [0-frame_height].
cv2.createTrackbar('y: ', 'Webcam Feed', 50, frame_height, nothing)

# Iterate until the webcam is accessed successfully.
while camera_video.isOpened():

    # Read a frame.
    ok, frame = camera_video.read()

    # Check if frame is not read properly then continue to the next iteration to read the next frame.
    if not ok:
        continue

    # Get the value of the radius of the circle (ball).
    radius = cv2.getTrackbarPos('Radius: ', 'Webcam Feed')

    # Get the x-coordinate value of the center of the circle (ball).
    x = cv2.getTrackbarPos('x: ', 'Webcam Feed')

    # Get the y-coordinate value of the center of the circle (ball).
    y = cv2.getTrackbarPos('y: ', 'Webcam Feed')

    # Draw the circle on the frame.
    cv2.circle(img=frame, center=(x, y),
               radius=radius, color=(113,182,255), thickness=-1)

    # Display the frame.
    cv2.imshow('Webcam Feed', frame)

    # Check if 'ESC' key is pressed and break the loop.
    if cv2.waitKey(20) & 0x FF == 27:
        break

# Release the VideoCapture Object and close the windows.
camera_video.release()
cv2.destroyAllWindows()
Output Video:
I don't know why, but this kind of reminds me of my childhood when I used to spend hours playing that famous Bouncing Ball Game on my father's Nokia phone 😂. But the ball (circle) we moved using trackbars wasn't bouncing, in fact there was no game mechanics, but hey you can actually change that if you want by adding actual physical properties ( like mass, force, acceleration, and everything ) to this ball (circle) using Pymunk library.
And I have made something similar in our latest course Computer Vision For Building Cutting Edge Applications too, by Combining Physics and Computer Vision, so do check that out, if you are interested in building complex, real-world, and thrilling AI applications.
Assignment (Optional)
Create 3 trackbars to control the RGB paint color in the paint application above and draw a resizable Ellipse on webcam feed utilizing mouse events and share the results with me in the comments section.
Additional Resources
Join My Course Computer Vision For Building Cutting Edge Applications Course

The only course out there that goes beyond basic AI Applications and teaches you how to create next-level apps that utilize physics, deep learning, classical image processing, hand and body gestures. Don’t miss your chance to level up and take your career to new heights
You’ll Learn about:
- Creating GUI interfaces for python AI scripts.
- Creating .exe DL applications
- Using a Physics library in Python & integrating it with AI
- Advance Image Processing Skills
- Advance Gesture Recognition with Mediapipe
- Task Automation with AI & CV
- Training an SVM machine Learning Model.
- Creating & Cleaning an ML dataset from scratch.
- Training DL models & how to use CNN's & LSTMS.
- Creating 10 Advance AI/CV Applications
- & More
Whether you're a seasoned AI professional or someone just looking to start out in AI, this is the course that will teach you, how to Architect & Build complex, real world and thrilling AI applications
Summary
In today’s tutorial, we went over almost all minor details regarding Mouse Events and TrackBars and used them to make a few fun applications.
First, we used mouse events to draw fixed size shapes, then we realized this size limitation and got around it by drawing shapes of different sizes. After that, we created a mini paint application capable of drawing anything, it had 3 different colors to select from and also had an option for erasing the drawings. And all of this ran on the live webcam feed. We then also learned about TrackBars in OpenCV and why they are useful and then we utilized them to move a resizable circle around on a webcam feed.
Also, don't forget that our ultimate goal for creating all these mini-applications was to get you familiar with Mouse Events and TrackBars. As we will need these to select a filter and change the applied filter intensity in real-time in the next post of this series, so buckle up, as things are about to get more interesting in the next week's post.
Let me know in the comments If you have any questions!


0 Comments