
A few weeks ago I published a tutorial on doing Super-resolution with OpenCV using the DNN module.
I would recommend that you go over that tutorial before reading this one but you can still easily follow along with this tutorial. For those of you who don’t know what Super-resolution is then here is an explanation.
Super Resolution can be defined as the class of Algorithms that upscales an image without losing quality, meaning you take a low-resolution image like an image of size 224×224 and upscale it to a high-resolution version like 1792×1792 (An 8x resolution) without any loss in quality. How cool is that?
Anyways that is Super resolution, so how is this different from the normal resizing you do?
When you normally resize or upscale an image you use Nearest Neighbor Interpolation. This just means you expand the pixels of the original image and then fill the gaps by copying the values of the nearest neighboring pixels.
The result is a pixelated version of the image.

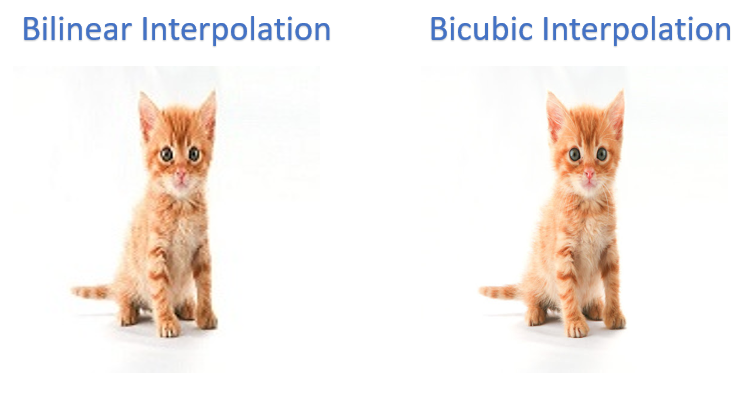
There are better interpolation methods for resizing like bilinear or bicubic interpolation which take weighted average of neighboring pixels instead of just copying them.
Still the results are blurry and not great.
The super resolution methods enhance/enlarge the image without the loss of quality, Again, for more details on the theory of super resolution methods, I would recommend that you read my Super Resolution with OpenCV Tutorial.
In the above tutorial I describe several architectural improvements that happened with SR Networks over the years.
But unfortunately in that tutorial, I only showed you guys a single SR model which was good but it only did a 3x resolution. It was also from a 2016 paper “Real-Time Single Image and Video Super-Resolution Using an Efficient Sub-Pixel Convolutional Neural Network”
That all changes now, in this tutorial we will work with multiple models, even those that will do 8x resolution.
Today, we won’t be using the DNN module, we could do that but for the super resolution problem OpenCV comes with a special module called dnn_superres which is designed to use 4 different powerful super resolution networks. One of the best things about this module is that It does the required pre and post processing internally, so with only a few lines of code you can do super resolution.
The 4 models we are going to use are:
- EDSR: Enhanced Deep Residual Network from the paper Enhanced Deep Residual Networks for Single Image Super-Resolution (CVPR 2017) by Bee Lim et al.
- ESPCN: Efficient Subpixel Convolutional Network from the paper Real-Time Single Image and Video Super-Resolution Using an Efficient Sub-Pixel Convolutional Neural Network (CVPR 2016) by Wenzhe Shi et al.
- FSRCNN: Fast Super-Resolution Convolutional Neural Networks from the paper Accelerating the Super-Resolution Convolutional Neural Network (ECCV 2016) by Chao Dong et al.
- LapSRN: Laplacian Pyramid Super-Resolution Network from the paper Deep Laplacian pyramid networks for fast and accurate super-resolution (CVPR 2017) by Wei-Sheng Lai et al.
Here are the papers for the models and some extra resources.
- EDSR: Paper, Code Implementation, Download models.
- ESPCN: Paper, Code Implementation, Download models.
- FSRCNN: Paper, Code Implementation, Download models.
- LapSRN: Paper, Code Implementation, Download models.
Make sure to download the zip folder from the download code section above. As you can see by clicking the Download models link that each model has different versions like 3x, 4x etc. This means that the model can perform 3x resolution, 4x resolution of the image, and so on. The download zip that I provide contains only a single version of each of the 4 models above.
You can feel free to test out other models by downloading them. These models should be present in your working directory if you want to use them with the dnn_superres module.
Now the inclusion of this super easy to use dnn_superres module is the result of the work of 2 developers Xavier Weber and Fanny Monori. They developed this module as part of their GSOC (Google summer of code) project. GSOC 2019 also made NVIDIA GPU support possible.
It’s always amazing to see how a summer project for students by google brings forward some great developers making awesome contributions to the largest Computer Vision library out there.
The dnn_superes module in OpenCV was included in version 4.1.2 for C++ but the python wrappers were added in 4.3 version about a month back, so you have to make sure that you have OpenCV version 4.3 installed. And of course, since this module is included in the contrib module so make sure you have also installed OpenCV contrib package.
[UPDATE 7/8/2020, OPENCV 4.3 IS NOW PIP INSTALLABLE]
Note: You can’t install OpenCV 4.3 version by doing pip install as the latest version here open-contrib-python from pip is still version 4.2.0.34.
So the pypi version of OpenCV is maintained by just one guy named: Olli-Pekka Heinisuo by username: skvark and he updates the pypi OpenCV package in his free time. Currently, he’s facing a compiling issue which is why 4.3 version has not come out as of 7-15-2020. But from what I have read, he will be building the .whl files for 4.3 version soon, it may be out this month. If that happens then I’ll update this post.
So right now the only way you will be able to use this module is if you have installed OpenCV 4.3 from Source. If you haven’t done that then you can easily follow my installation tutorial.
I should also take this moment to highlight the fact you should not always rely on OpenCV’s pypi package, no doubt skvark has been doing a tremendous job maintaining OpenCV’s pypi repo but this issue tells you that you can’t rely on a single developer’s free time to update the library for production use cases, learn to install the Official library from source. Still, pip install opencv-contrib-python is a huge blessing for people starting out or in early stages of learning OpenCV, so hats off to skvark.
As you might have noticed among the 4 models above we have already learned to use ESPCNN in the previous tutorial, we will use it again but this time with the dnn_superres module.
Super Resolution with dnn_superres Code
[optin-monster slug=”rvfkmnfpxleeisjulg1h”]
Directory Hierarchy
After downloading the zip folder, unzip it and you will have the following directory structure.
This is how our directory structure looks like, it has a Jupyter notebook, a media folder with images and the model folder containing all 4 models.
Super resolution_Going_from_3x_to_8x_Resolution
    │   Super resolution_Going_from_3x_to_8x_Resolution.ipynb
    │
    ├───Media
    │       bird2.JPG
    │       butterfly.JPG
    │       demo1.mp4
    │       fman1.JPG
    │       manh.JPG
    │       nature.JPG
    │       road.jpg
    │
    ├───models
    │       EDSR_x4.pb
    │       ESPCN_x4.pb
    │       FSRCNN_x3.pb
    │       LapSRN_x8.pb
    │
    └───outputs
            enhanced_bird2.jpg
            enhanced_butterfly.jpg
            enhanced_fman.jpg
            enhanced_manh.jpg
            enhanced_road.jpg
            fman_enhanced.jpg
            testoutput.png
You can now run the notebook Super_Resolution_with_dnn_superres.ipynb and start executing each cell as follows.
Import Libraries
Start by Importing the required libraries.
import cv2
import numpy as np
import matplotlib.pyplot as plt
import os
import time

from cv2 import dnn_superres
Initialize the Super Resolution Object
First you have to create the dnn_superres constructor by the following command.
# Create an SR object
sr = dnn_superres.DnnSuperResImpl_create()
Read Image
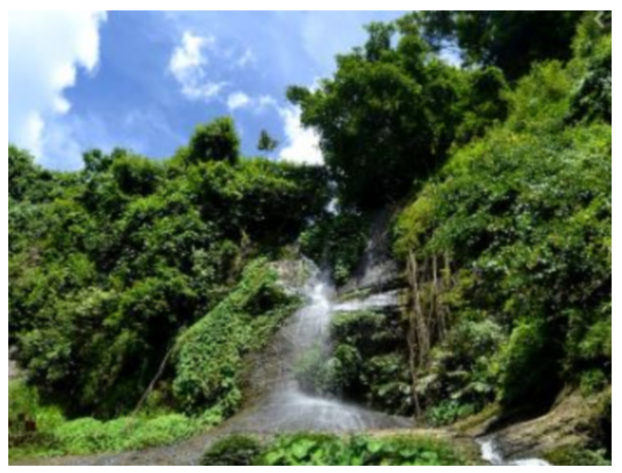
We will start by reading and displaying a sample image. We will be running the EDSR model (with 4x scale) to upscale this image.
# Read the image
image = cv2.imread("Media/nature.jpg")

# Display image
plt.figure(figsize=[12,12])
plt.imshow(image[:,:,::-1], interpolation = 'bicubic');plt.axis('off');
Extracting Model Name & Scale
In the next few steps, will be using a setModel() function in which we will pass the model’s name and its scale. We could manually do that but all this information is already present in the model’s pathname so we just need to extract the model’s name and scale using simple text processing.
# Define model path, if you want to use a different model then just change this path.
model_path = "models/EDSR_x4.pb"

# Extract model name, get the text between '/' and '_'
model_name = model_path.split('/')[1].split('_')[0].lower()

# Extract model scale
model_scale = int(model_path.split('/')[1].split('_')[1].split('.')[0][1])

# Display the name and scale
print("model name: "+ model_name)
print("model scale: " + str(model_scale))
model name: edsr
model scale: 4
Reading the model
Finally we will read the model, this is where all the required weights of the model gets loaded. This is equivalent to DNN module’s readnet function
# Read the desired model
sr.readModel(model_path)
Setting Model Name & Scale
Here we are setting the name and scale of the model which we extracted above.
Why do we need to do that ?
So remember when I said that this module does not require us to do preprocessing or postprocessing because it does that internally. So in order to initiate the correct pre and post-processing pipelines, the module needs to know which model we will be using and what version meaning what scale 2x, 3x, 4x etc.
# Set the desired model and scale to get correct pre-processing and post-processing
sr.setModel(model_name, model_scale)
Running the Network
This is where all the magic happens. In this line a forward pass of the network is performed along with required pre and post-processing. We are also making note of the time taken as this information will tell us if the model can be run in real-time or not.
As you can see it takes a lot of time, in fact, EDSR is the most expensive model out of the four in terms of computation.
It should be noted that larger your input image’s resolution is the more time its going to take in this step.
%%time
# Upscale the image
Final_Img = sr.upsample(image)
Wall time: 45.1 s
Check the Shapes
We’re also checking the shapes of the original image and the super resolution image. As you can see the model upscaled the image by 4 times.
print('Shape of Original Image: {} , Shape of Super Resolution Image: {}'.format(image.shape, result.shape))Shape of Original Image: (262, 347, 3) , Shape of Super Resolution Image: (1200, 1200, 3)
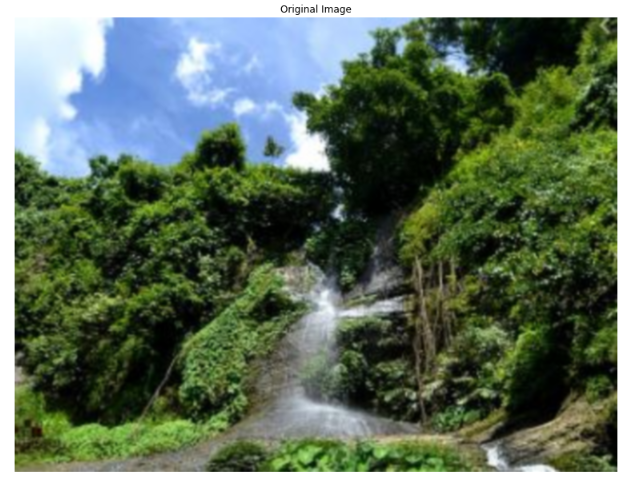
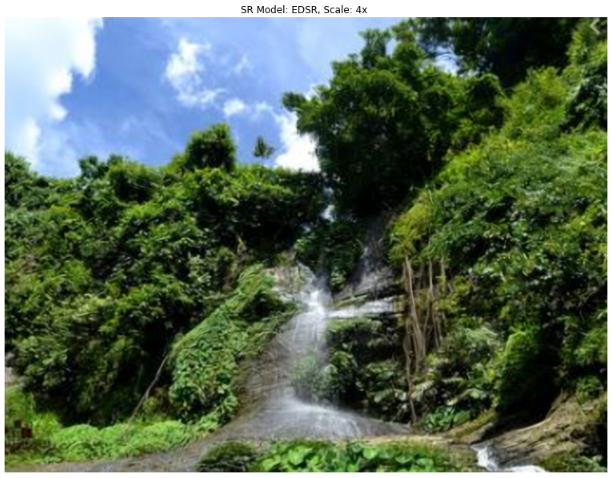
Comparing the Original Image & Result
Finally we will display the original image along with its super resolution version. Observe the difference in Quality.
# Display Image
plt.figure(figsize=[23,23])
plt.subplot(2,1,1);plt.imshow(image[:,:,::-1], interpolation = 'bicubic');plt.title("Original Image");plt.axis("off");
plt.subplot(2,1,2);plt.imshow(Final_Img[:,:,::-1], interpolation = 'bicubic');
plt.title("SR Model: {}, Scale: {}x ".format(model_name.upper(),model_scale)); plt.axis("off");
Save the High Resolution Image
Although you can see the improvement in quality but still you can’t observe the true difference with matplotlib so its recommended that you save the SR image in disk and then look at it.
# Save the image
cv2.imwrite("outputs/testoutput.png", Final_Img);
Creating Functions
Now that we have seen a step by step implementation of the whole pipeline, we’ll create the 2 following python functions so we can use different models on different images by just calling a function and passing some parameters.
Initialization Function: This function will contain parts of the network that will be set once, like loading the model.
Main Function: This function will contain the rest of the code. it will also have the option to either return the image or display it with matplotlib. We can also use this function to process a real-time video.
Initialization Function
def init_super(model, base_path='models'):

    # Define global variable
    global sr, model_name, model_scale

    # Create an SR object
    sr = dnn_superres.DnnSuperResImpl_create()

    # Define model path
    model_path = os.path.join(base_path , model +".pb")

    # Extract model name from model path
    model_name = model.split('_')[0].lower()

    # Extract model scale from model path
    model_scale = int(model.split("_")[1][1])

    # Read the desired model
    sr.readModel(model_path)

    sr.setModel(model_name, model_scale)
Main Function
Set returndata = True when you just want the image. This is usually done when I’m working with videos. I’ve also added a few more optional variables to the method.
print_shape: This variable decides if you want to print out the shape of the model’s output.
name: This is the name by which you will save the image in disk.
save_img: This variable decides if you want to save the images in disk or not.
def super_res(image, returndata=False, save_img=True, name='test.png', print_shape=True):

    # Upscale the image
    Final_Img = sr.upsample(image)

    if  returndata:
        return Final_Img

    else:

        if print_shape:
            print('Shape of Original Image: {} , Shape of Super Resolution Image: {}'.format(image.shape, Final_Img.shape))


        if save_img:
            cv2.imwrite("outputs/" + name, Final_Img)


        plt.figure(figsize=[25,25])
        plt.subplot(2,1,1);plt.imshow(image[:,:,::-1], interpolation = 'bicubic');plt.title("Original Image");plt.axis("off");
        plt.subplot(2,1,2);plt.imshow(Final_Img[:,:,::-1], interpolation = 'bicubic');
        plt.title("SR Model: {}, Scale: {}x ".format(model_name.upper(), model_scale)); plt.axis("off");
Now that we have created the initialization function and a main function, lets use all 4 models on different examples
The function above displays the original image along with the SR Image.
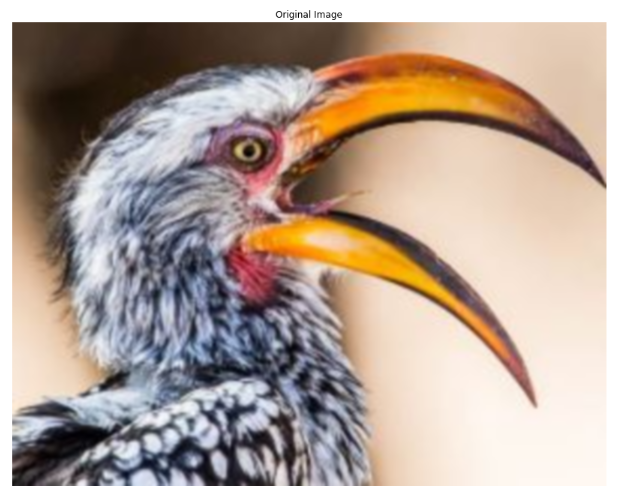
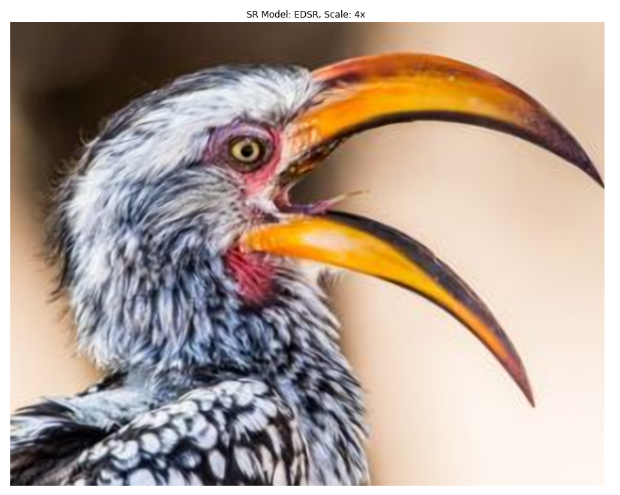
Initialize Enhanced Deep Residual Network (EDSR, 4x Resolution)
init_super("EDSR_x4")
Run the network
%%time
image = cv2.imread("Media/bird2.jpg")
super_res(image, name= 'enhanced_bird2.jpg')
Shape of Original Image: (221, 283, 3) , Shape of Super Resolution Image: (884, 1132, 3)
Wall time: 43.1 s
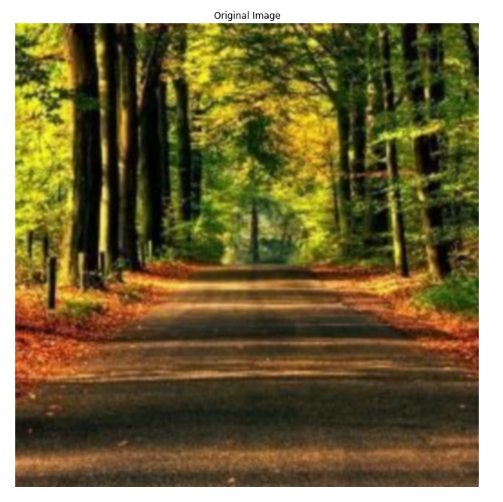
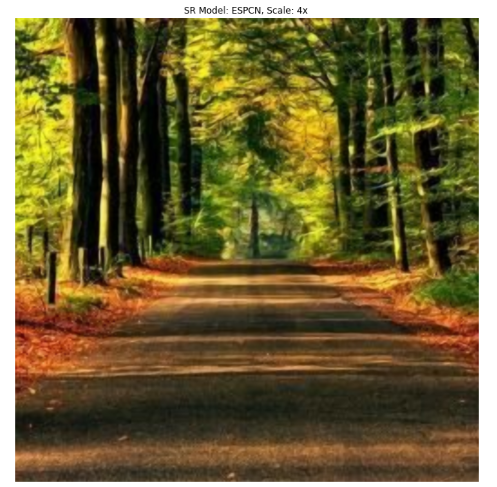
Initialize Efficient Subpixel Convolutional Network (ESPCN, 4x Resolution)
init_super("ESPCN_x4")Run the network
%%time
image = cv2.imread("Media/road.jpg")
super_res(image, name='enhanced_road.jpg')
Shape of Original Image: (256, 256, 3) , Shape of Super Resolution Image: (1024, 1024, 3)
Wall time: 295 ms
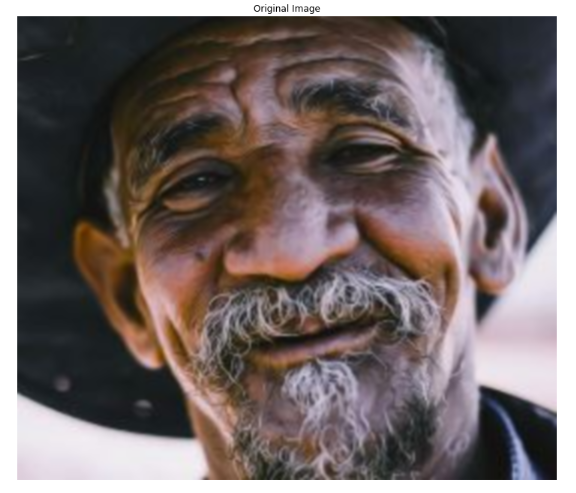
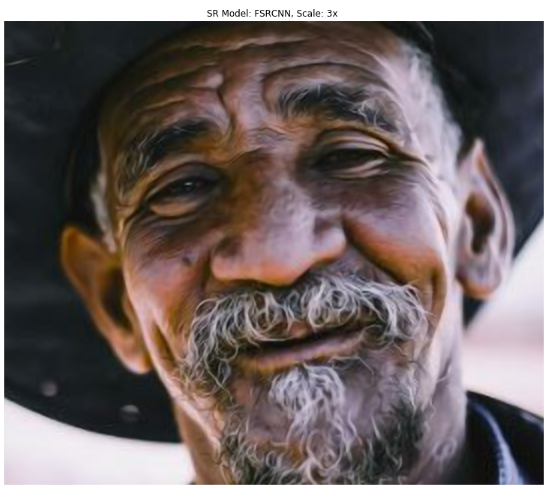
Initialize Fast Super-Resolution Convolutional Neural Networks (FSRCNN, 3x Resolution)
init_super("FSRCNN_x3")Run the network
%%time
image = cv2.imread("Media/manh.jpg")
super_res(image, name = 'enhanced_manh.jpg')
Shape of Original Image: (232, 270, 3) , Shape of Super Resolution Image: (696, 810, 3)
Wall time: 253 ms
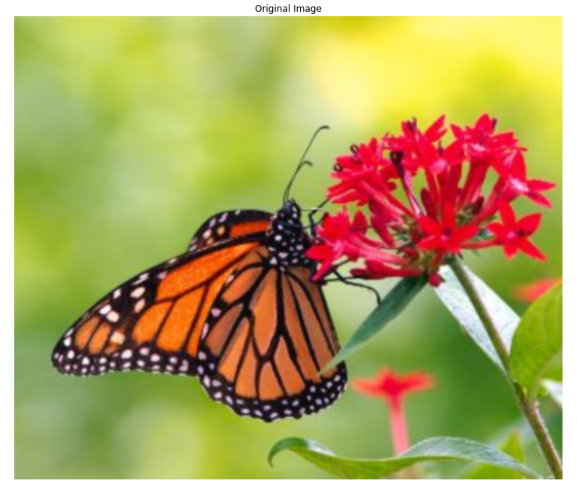
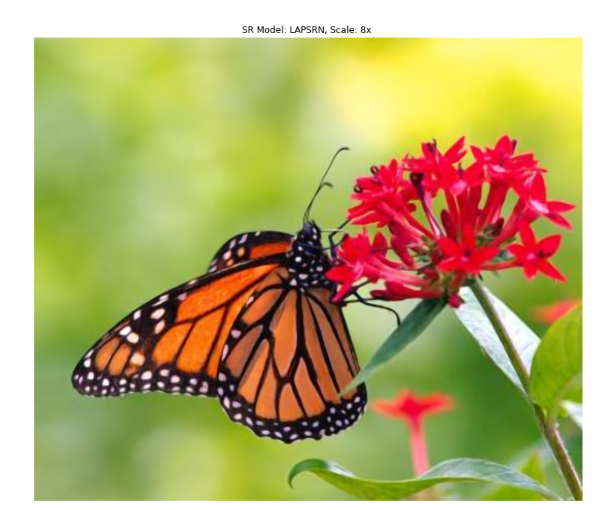
Initialize Laplacian Pyramid Super-Resolution Network (LapSRN, 8x Resolution)
init_super("LapSRN_x8")Run the network
%%time
image = cv2.imread("Media/butterfly.jpg")
super_res(image, name='enhanced_butterfly.jpg')
Shape of Original Image: (302, 357, 3) , Shape of Super Resolution Image: (2416, 2856, 3)
Wall time: 26 s
Applying Super Resolution on Video
Lastly, I’m also providing the code to run Super-resolution on Videos. Although the example video I’ve used sucks, but that’s the only video I tested on primarily because I’m only interested in doing super resolution on images as this is where most of my use cases lie. Feel free to test out different models for real-time feed.
Tip: You might also want to save the High res video in disk using the VideoWriter Class.
# Set the fps counter to 0
fps=0

# Initialize the network.
init_super("ESPCN_x4")

# Initialize the videcapture object with the video.
cap = cv2.VideoCapture('media/demo1.mp4')


while(True):

    # Note the starting time for fps calculation.
    start_time = time.time()

    # Read frame by frame.
    ret,frame=cap.read()

    # Break the loop if the video ends.
    if not ret:
        break

    # Perform SR with returndata = True.
    image = super_res(image, returndata=True)

    # Put the value of FPS on the video.
    cv2.putText(image, 'FPS: {:.2f}'.format(fps), (10, 20), cv2.FONT_HERSHEY_SIMPLEX,0.8, (255, 20, 55), 1)

    # Show the current frame.
    cv2.imshow("Super Resolution", image)

    # Wait 1 ms and calculate the fps.
    k = cv2.waitKey(1)
    fps= (1.0 / (time.time() - start_time))

    # If the user presses the `q` button then break the loop.
    if k == ord('q'):
        break

# Release the camera and destroy all the windows.
cap.release()
cv2.destroyAllWindows()
Conclusion
Here’s a chart for benchmarks using a 768×512 image with 4x resolution on an Intel i7-9700K CPU for all models.
The benchmark shows PSNR (Peak signal to noise ratio) and SSIM (structural similarity index measure) scores, these are the scores which measure how good the supre res network’s output is.
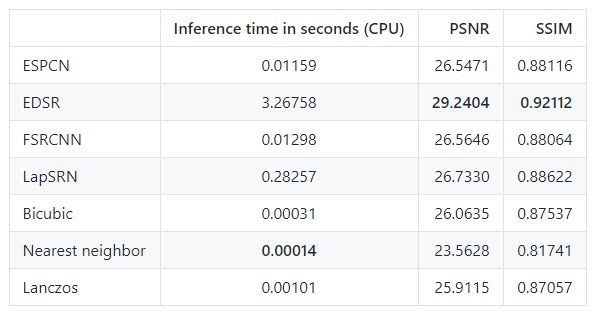
The best performing model is EDSR but it has the slowest inference time, the rest of the models can work in real time.
For detailed benchmarks you can see this page. Also make sure to check Official OpenCV contrib page on dnn_superres module
If you thought upscaling to 8x resolution was cool then take a guess on the scaling ability of the current state of the Art algorithm in super-resolution?
So believe it or not the state of the art in SR can actually do a 64x resolution…yes 64x, that wasn’t a typo.
In fact, the model that does 64x was published just last month, here’s the paper for that model, here’s the GitHub repo and here is a ready to run colab notebook to test out the code. Also here’s a video demo of it. It’s pretty rare that such good stuff is easily accessible for programmers just a month after publication so make sure to check it out.
The model is far too complex to explain in this post but the authors took a totally different approach, instead of using supervised learning they used self-supervised learning. (This seems to be on the rise).
You’ll come across many Computer Vision courses out there, but nothing beats a 1 on 1 video call support from an expert in the field. Plus there is a plethora of subfields and tons of courses on AI and computer vision out there, you need someone to lay out a step-by-step learning path customized to your needs. This is where I come in, whether you need monthly support or just want to have a one-time chat with me, I’ve got you covered. Check all the coaching details and packages here
Ready? Get Started on 1×1 Coaching here.
Summary:
In today’s tutorial we learned to use 4 different architectures to do Super resolution going from 3x to 8x resolution.
Since the library handles preprocessing and postprocessing, so the code for all the models was almost the same and pretty short.
As I mentioned earlier, I only showed you results of a single version of each model, you should go ahead and try other versions of each model.
These models have been trained using DIV2K BSDS and General100 datasets which contains images of diverse objects but the best results from a super-resolution model is obtained by training them for a domain-specific task, for e.g if you want the SR model to perform best on pedestrians then your dataset should consist mostly of pedestrian images. The best part about training SR networks is that you don’t need to spend hours doing manual annotation, you can just resize them and you’re all set.
Also I would raise a concern regarding these models that we must be careful using SR networks, for e.g. consider this scenario:
You caught an image of a thief stealing your mail on your low res front door cam, the image looks blurry and you can’t make out who’s in the image.
Now you being a Computer Vision enthusiast thought of running a super res network to get a clearer picture.
After running the network, you get a much clearer image and you can almost swear that it’s Joe from the next block.
The same Joe that you thought was a friend of yours.
The same Joe that made different poses to help you create a pedestrian datasets for that SR network you’re using right now.
How could Joe do this?
Now you feel betrayed but yet you feel really Smart, you solved a crime with AI right?
You Start STORMING to Joe’s house to confront him with PROOF.
Now hold on! … like really hold on.
Don’t do that, seriously don’t do that.
Why did I go on a rant like that?
Well to be honest back when I initially learned about SR networks that’s almost exactly what I thought I would do. Solve Crimes by AI by doing just that (I know it was a ridiculous idea). But soon I realize that SR networks only learn to hallucinate data based on learned data, they can’t visualize a face with 100% accuracy that they’ve never seen. It’s still pretty useful but you have to use this technology carefully.
I hope you enjoyed this tutorial, feel free to comment below and I’ll gladly reply.
You can reach out to me personally for a 1 on 1 consultation session in AI/computer vision regarding your project. Our talented team of vision engineers will help you every step of the way. Get on a call with me directly here.


Hi! This is so cool! but, do you have the source code for the Nearest Neighbor, Bilinear, and Bicubic Interpolation mentioned in this tutorial? I’ve looked for these Interpolation all over the internet but they yield different result than I was hoping for. Thank you so much for the tutorial it’s really hepful!
Hi, thanks Farell for the appreciation, you can look at the source code for other methods on the top of this page:
https://docs.opencv.org/4.2.0/da/d6e/tutorial_py_geometric_transformations.html
You just need to use cv2.resize() function in opencv with some flags to achieve this.