This is a multipurpose tutorial because not only we will install TensorFlow 2.0 with GPU but we will also set up our Nvidia GPU for OpenCV source installation so that we can use our GPU with the OpenCV DNN module. The Blog post for source installation of OpenCV in windows can be accessed here.
Note: For this tutorial you must have an Nvidia Cuda compatible GPU & I’m also assuming that you already have python installed in your system, if not then you can go ahead and install anaconda distribution for python 3.7 here.
Alright Let’s Get Started
Step 0: Uninstall any program that says NVIDIA:
First of all to avoid any headaches down the road, you should uninstall any NVIDIA related programs or drivers, don’t worry I’ll show you how to install the latest drivers. In case you are pretty sure that you have the correct drivers installed then you don’t need to perform this step.
Step 1 (a): Download Visual Studio 2019:
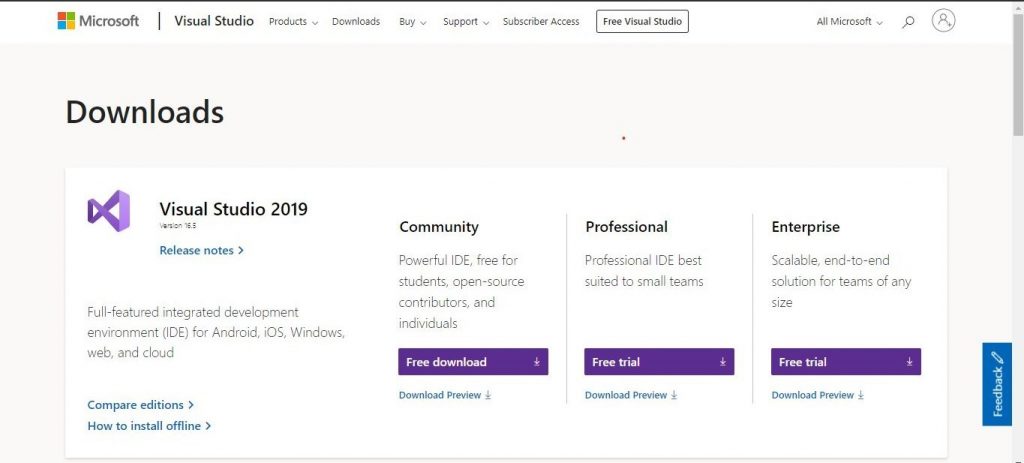
Click here to download the Microsoft Visual Studio 2019 Community version
After Downloading you will get a .exe file.

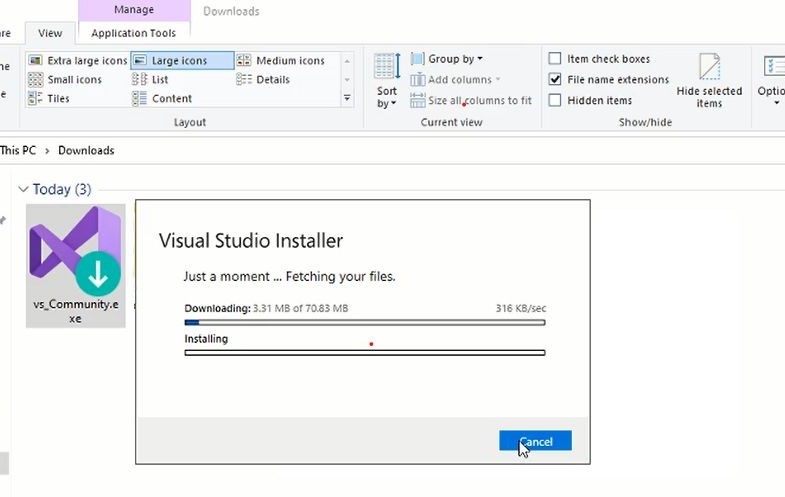
Step 1 (b): Install Visual Studio 2019
In order to begin the installation process click on the vs installer file and continue with default settings. After that downloading will begin and after downloading the installation process will start.
Step 1 (c): Select The Workloads in Visual Studio 2019
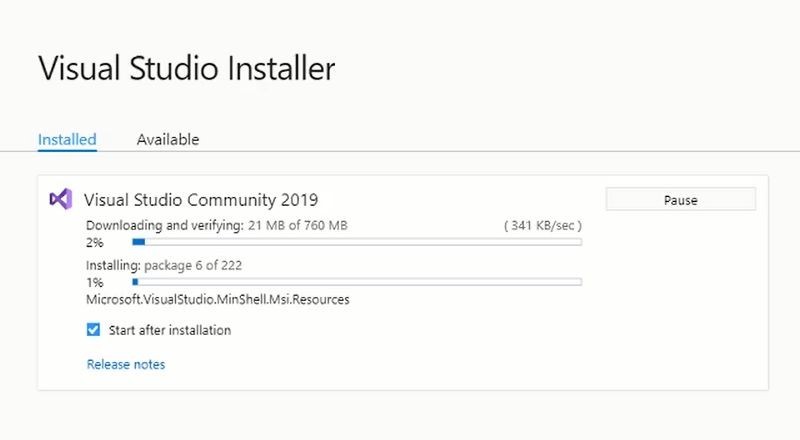
Finally, after completing the installation, you will be required to select workloads
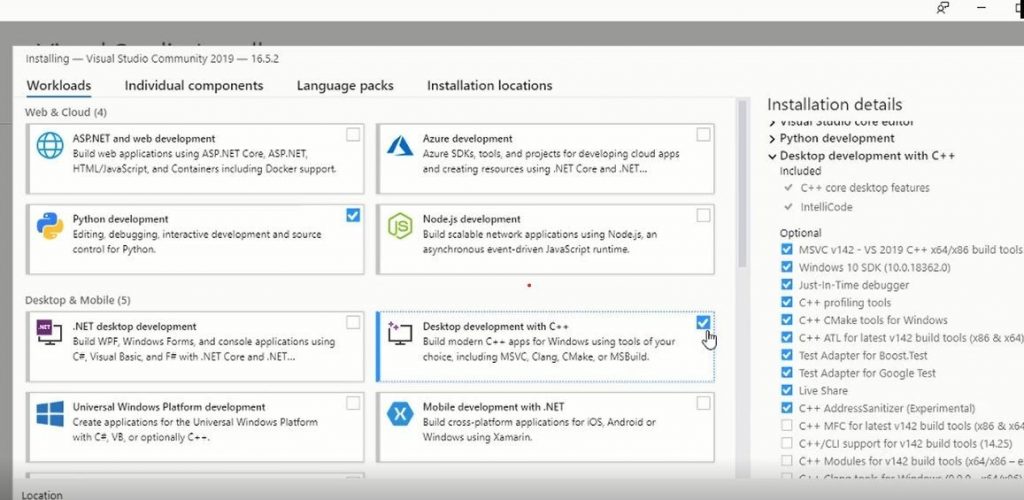
As you can see above that we have Selected Python Development and Desktop Development C++
Make sure to select Desktop development with c++ otherwise at the time of CMake compilation during OpenCV source installation you will get errors.
After Selecting the workloads Click the Install Button and your Packages will start downloading and then installing.
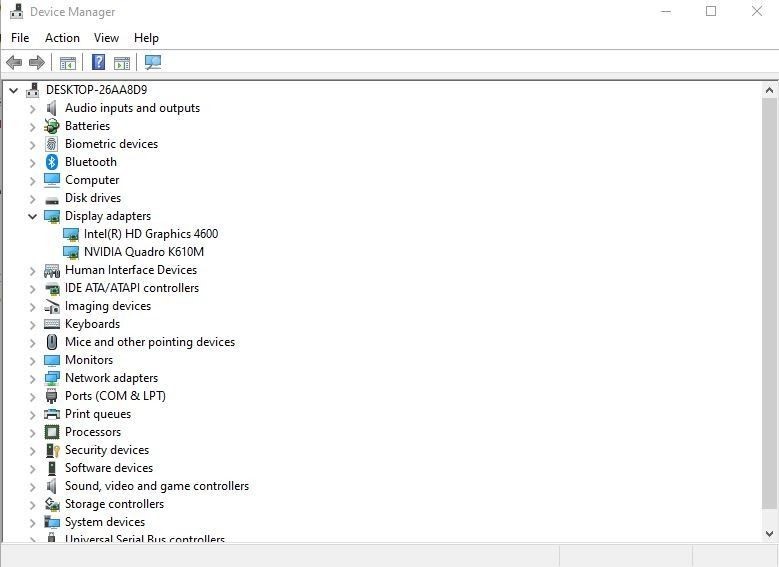
Step 2 (a): Check your Graphics Card.
Go to the device manager and under display adapters note down the name of your Nvidia Graphics card.
Step 2 (b): Download & Install the driver:
Now go to the Nvidia homepage here, and put your graphics card Operating system info as shown, I’m putting this information according to my card, for your card it will be different.
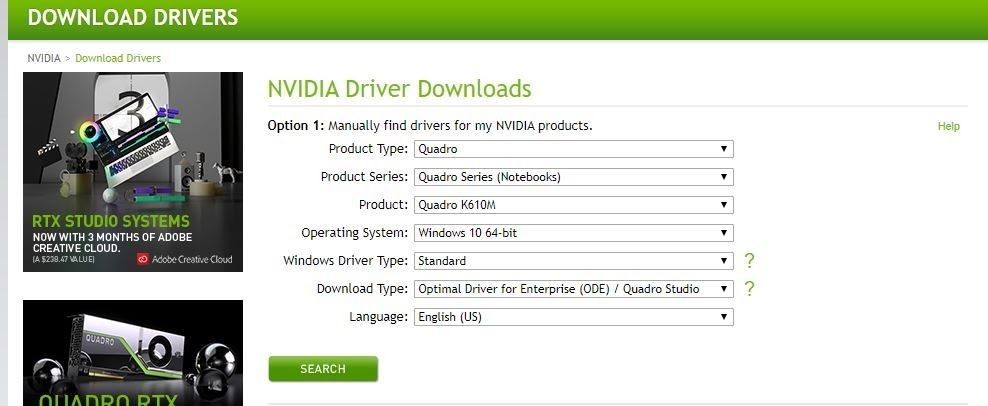
After this hit search & you will be able to download the driver.

After downloading you have to launch the .exe file and install the driver, it’s a pretty smooth process. If you selected a wrong driver then it will tell you that during the installation.
Optionally if you’re confused you can also watch a video walkthrough of step 2a & step 2b here.
Step 3: Download & Install Cuda Toolkit:
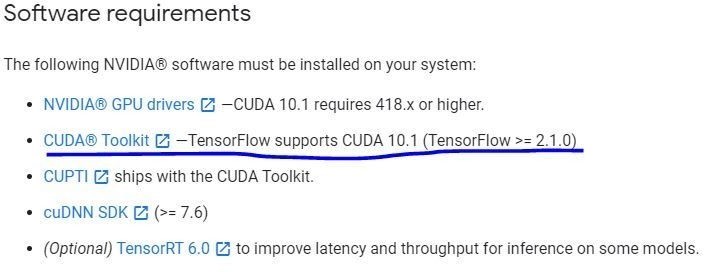
Now you can head over to the TensorFlow GPU Support page here and see the latest required Cuda toolkit version for the TensorFlow GPU.
In my case, it’s Cuda version 10.1
You can download the Cuda toolkit 10.1 version from here. I have selected my windows 10 and a .exe local file, Now you will download the 2.4 GB file.
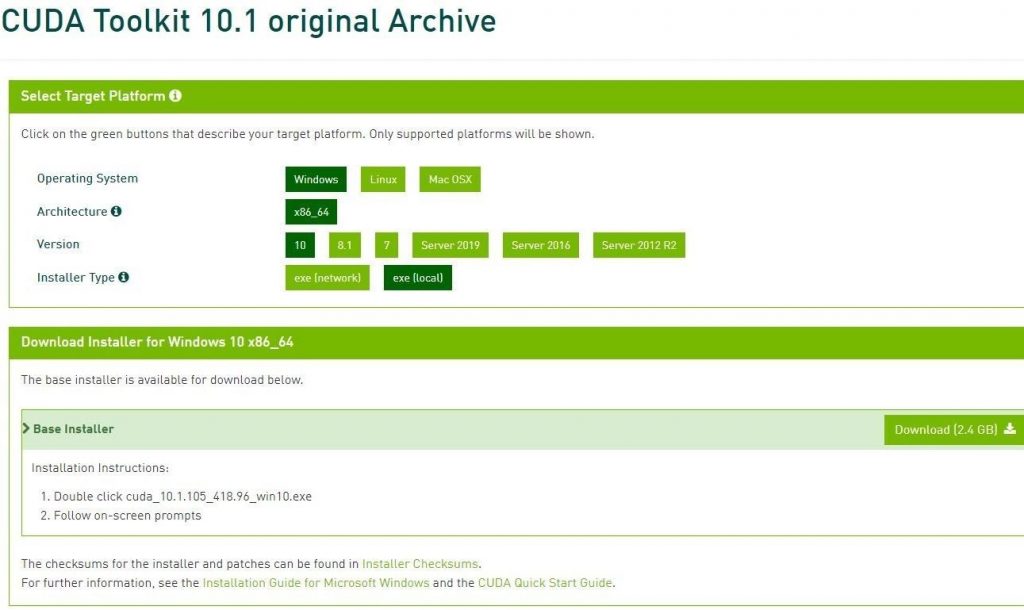
After downloading the Cuda toolkit, run it through the installation process.
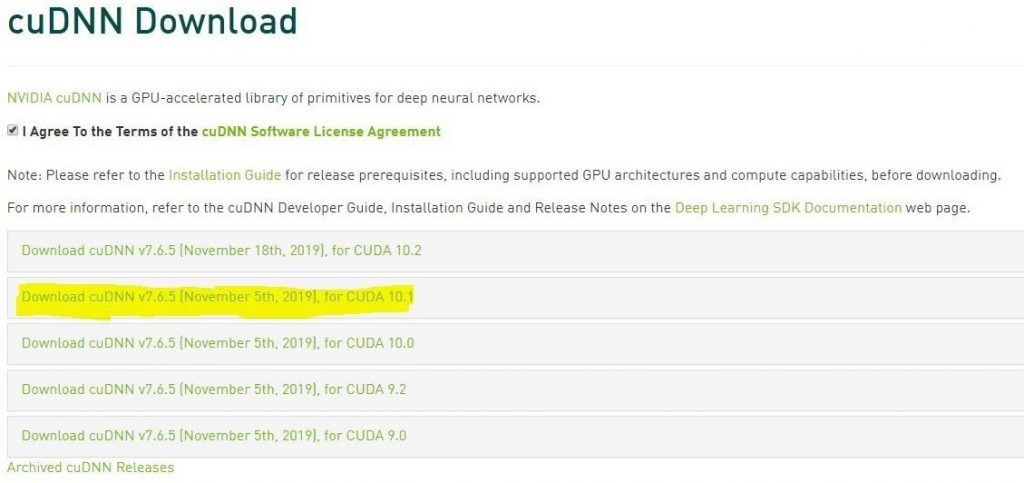
Step 4 (a): Download CudNN:
Now you need to download cudNN but before you can do that you need to make an account on NVIDIA, so first make an account here.
After you have made the account you can download cuDNN from here. Note Download the correct compatible version of cudNN for your associated Cuda toolkit version, for e.g. I will be downloading cuDNN v7.6.5, for CUDA 10.1 which is compatible with Cuda toolkit version 10.1
Step 4 (b): Configure CuDNN:
After downloading the cuDNN zip folder, extract it and then you will have 3 folders bin, include & lib like this:

Now navigate to where you installed Cuda 10.1 toolkit. For me, the path was this: C:\Program Files\NVIDIA GPU Computing Toolkit\CUDA\v10.1
Inside v10.1 directory you will see these folders there:
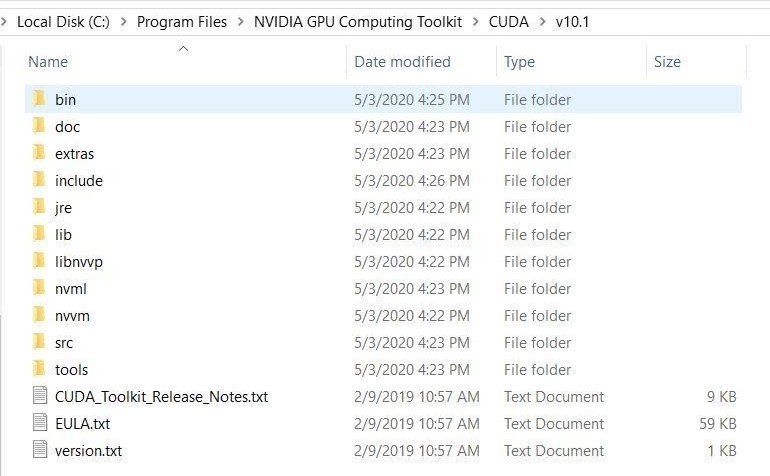
Now what you will do is take the contents of the bin, include & lib folders inside of cuDNN unzipped folder and put it inside the bin, include & lib folders of v10.1 directory.
- So you will take the file cudnn64_7.dll (from the bin folder of cuDNN) and put it inside the bin folder of v10.1.
- Then you will take cudnn.ln (from include folder of cuDNN) and put it inside the include folder of v10.1.
- Then you will take cudnn.lib (from lib/64 folder of cuDNN) and put it inside lib/x64/ folder of v10.1.
Don’t worry if you are confused, I will give you a video walkthrough the link of this step.
Step 4 (c): Add Paths to Environment variables.
The next step is to add the path to your bin folder inside v10.1 and libnvvp to the path variable inside user variables in the Environment variables.
These paths are:
C:\Program Files\NVIDIA GPU Computing Toolkit\CUDA\v10.1\bin
C:\Program Files\NVIDIA GPU Computing Toolkit\CUDA\v10.1\libnvvp

Of course if you’re using different versions then the path would be different instead of 10.1 and so on, after editing the path apply the changes.
Step 5: Install Tensorflow GPU.
Now you’re all set to install TensorFlow-GPU, open up the cmd, and run the command:
pip install –ignore-installed –upgrade tensorflow-gpu
After installation if you’re able to import TensorFlow then your installation was successful.

You can watch this video walkthrough for the steps 3-4. Note: You don’t need to watch the full video and the versions are of course outdated.
Congratulations on Installing Tensorflow GPU
Find Cuda Architecture Version for OpenCV:
Note: This step is for those people who need the architecture version for OpenCV Source installation tutorial, this tutorial can be accessed here.
Now just head over here.
Find your exact GPU name and note the compute capability, the compute capability is the architecture version which we will be using during the installation of OpenCV from Source.
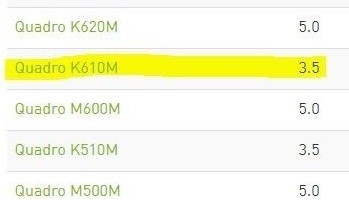
Since I’m using a Quadro k610M GPU on my laptop, I’ll search for my GPU under Cuda-Enabled Quadro Products.
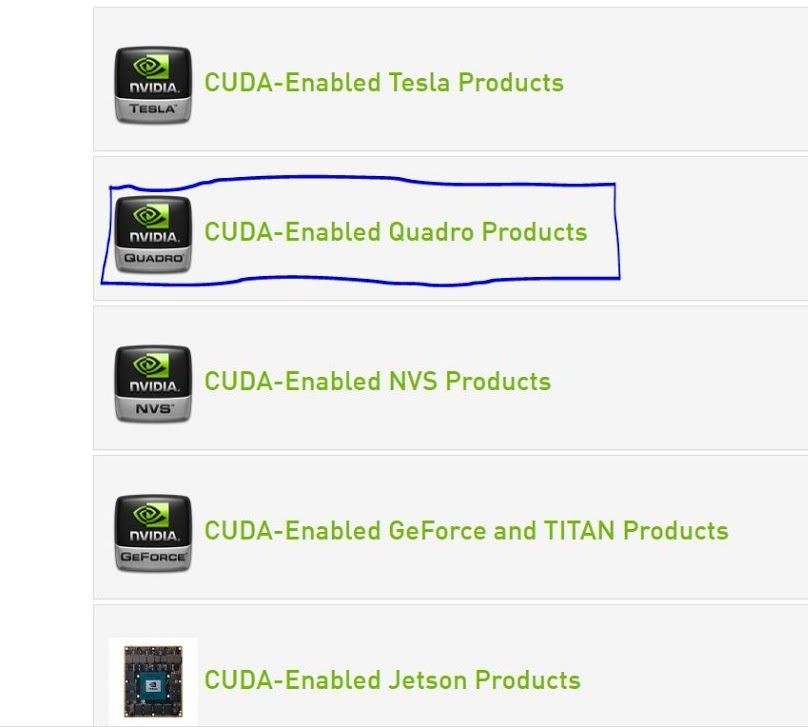
Now by searching I can see that my architecture version is: 3.5, this is a pretty low number but hey I’m not using a big machine here.
And That’s it
I’m offering a premium 3-month Comprehensive State of the Art course in Computer Vision & Image Processing with Python (Urdu/Hindi). This course is a must take if you’re planning to start a career in Computer vision & Artificial Intelligence, the only prerequisite to this course is some programming experience in any language.
This course goes into the foundations of Image processing and Computer Vision, you learn from the ground up what the image is and how to manipulate it at the lowest level and then you gradually built up from there in the course, you learn other foundational techniques with their theories and how to use them effectively.


0 Comments